Strawberry Sourdough Bread

by sourdoughjesha on November 13, 2025
This fresh strawberry sourdough bread is naturally sweet, with delicious swirls of real strawberry in every single bite. Filled with fresh, diced strawberries and freeze-dried strawberries, it’s so easy to make and bursting with strawberry flavor.
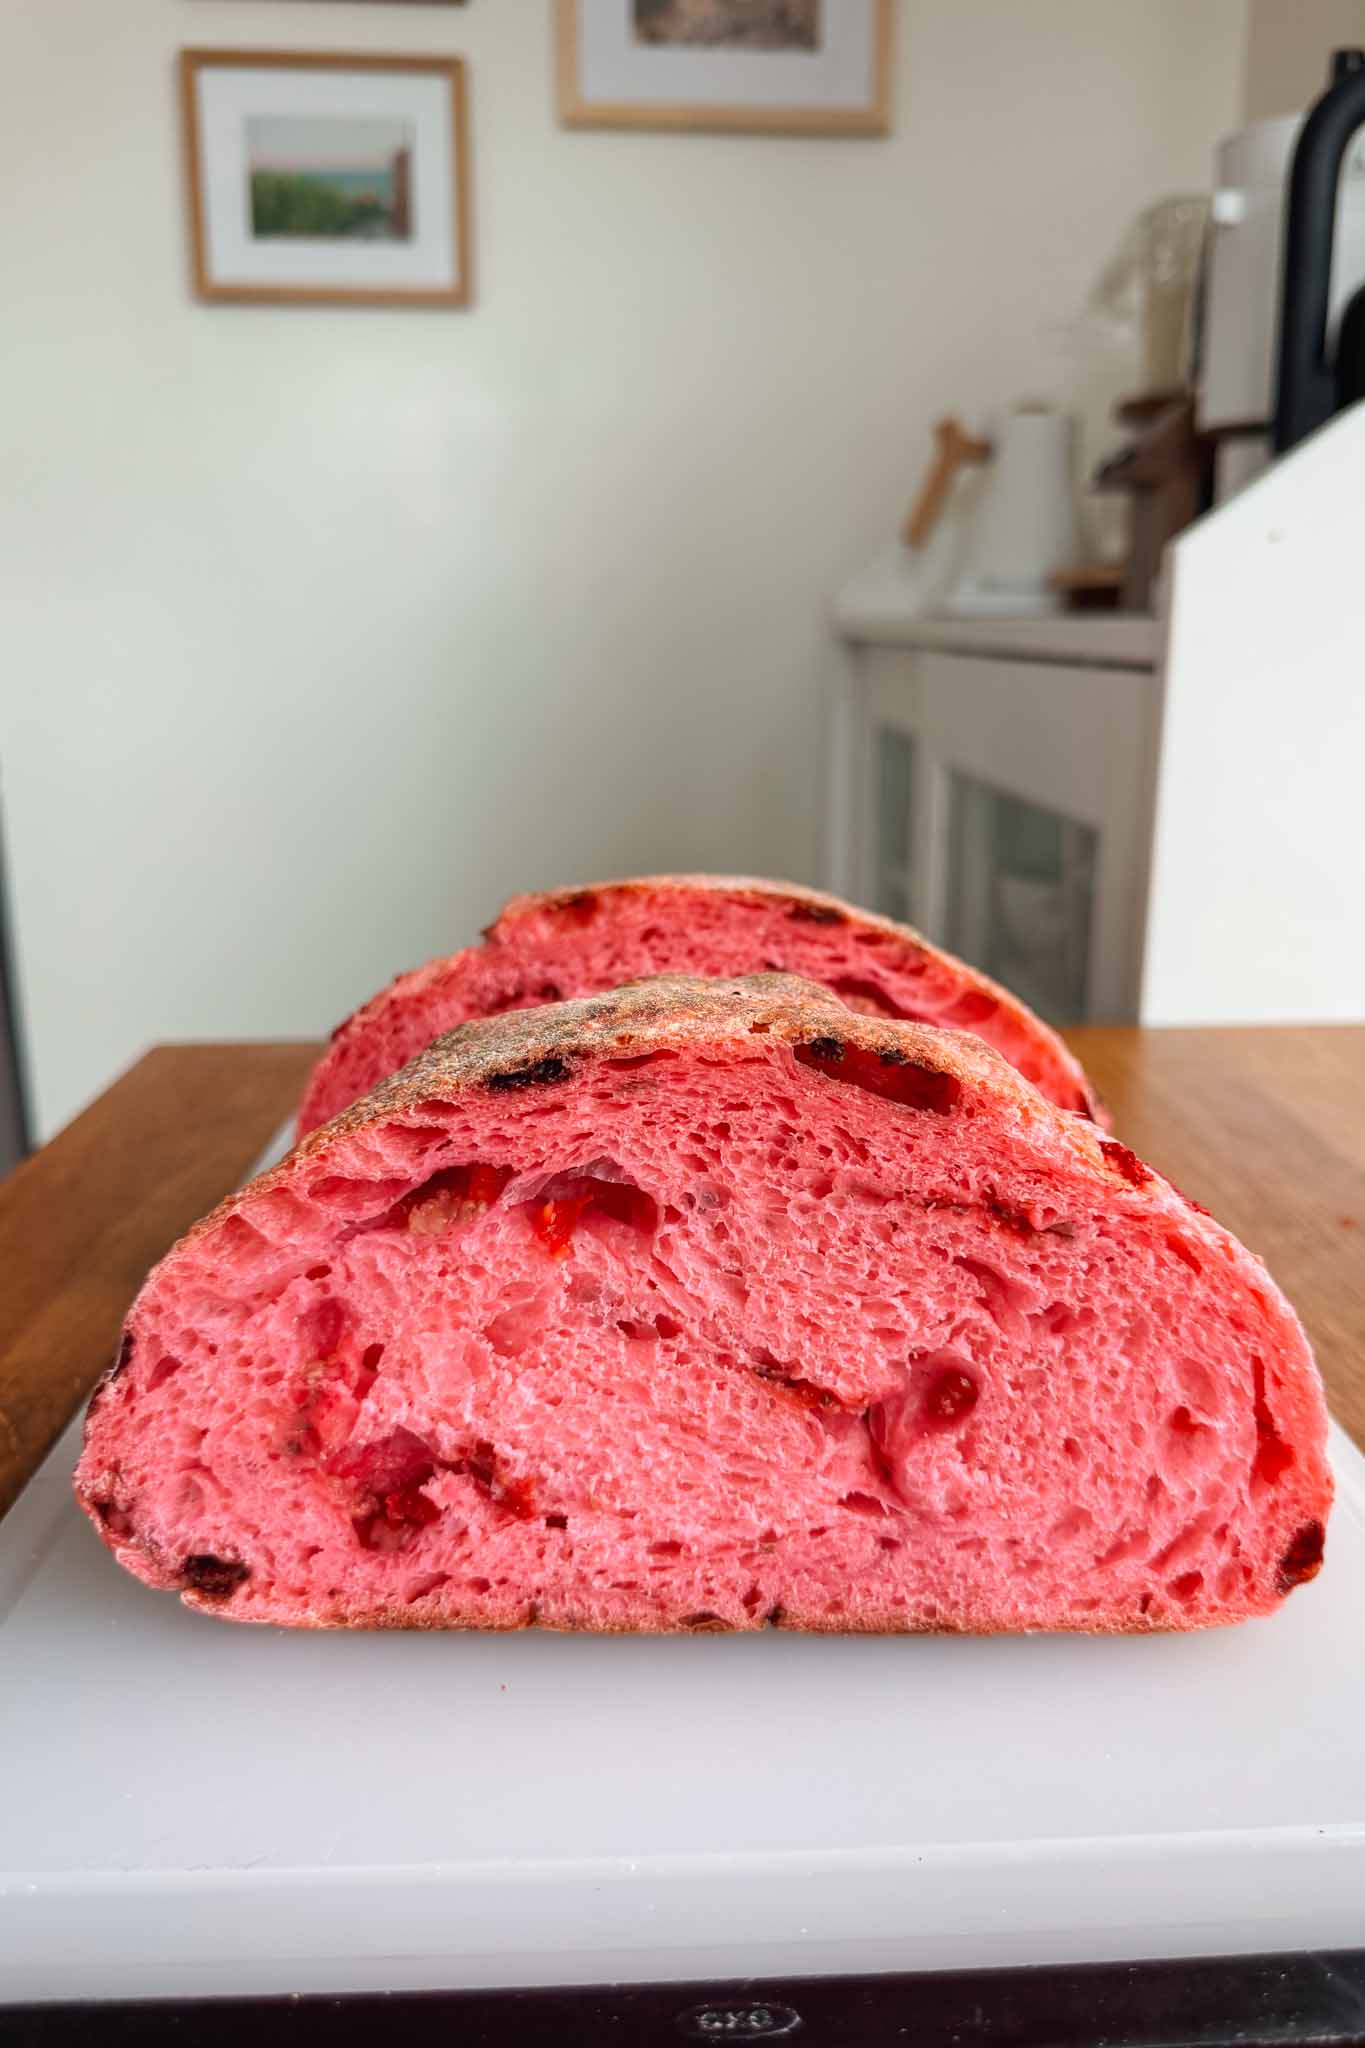
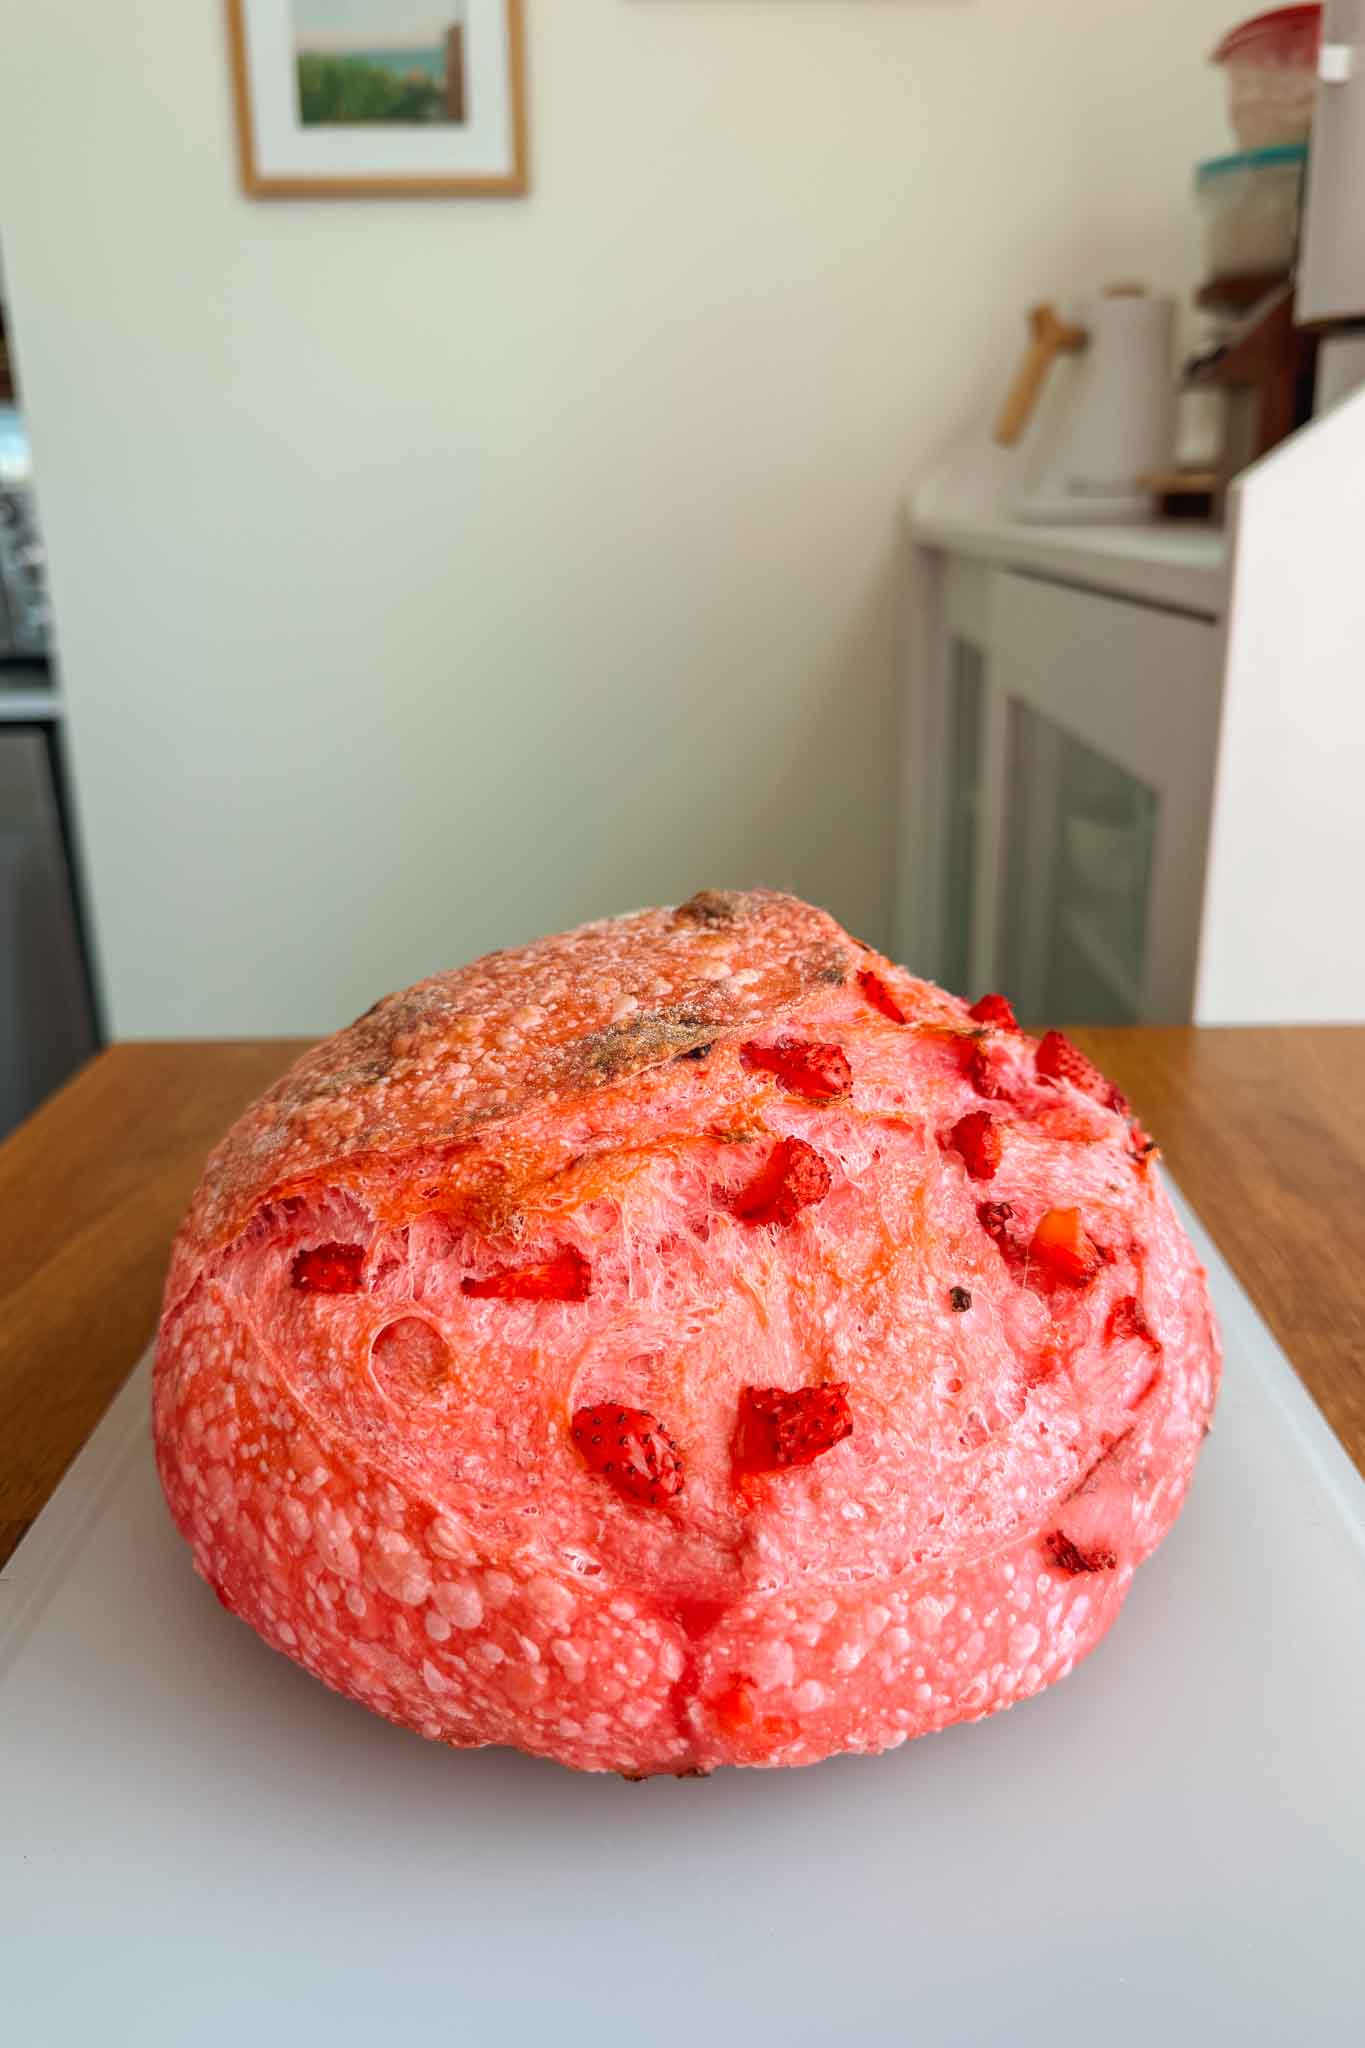
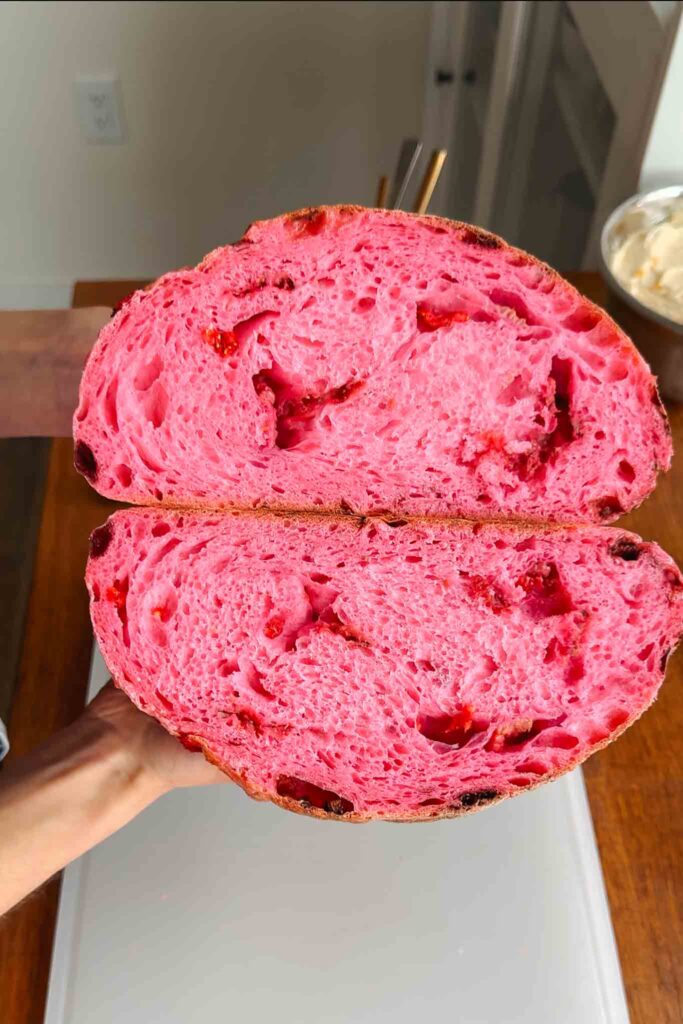
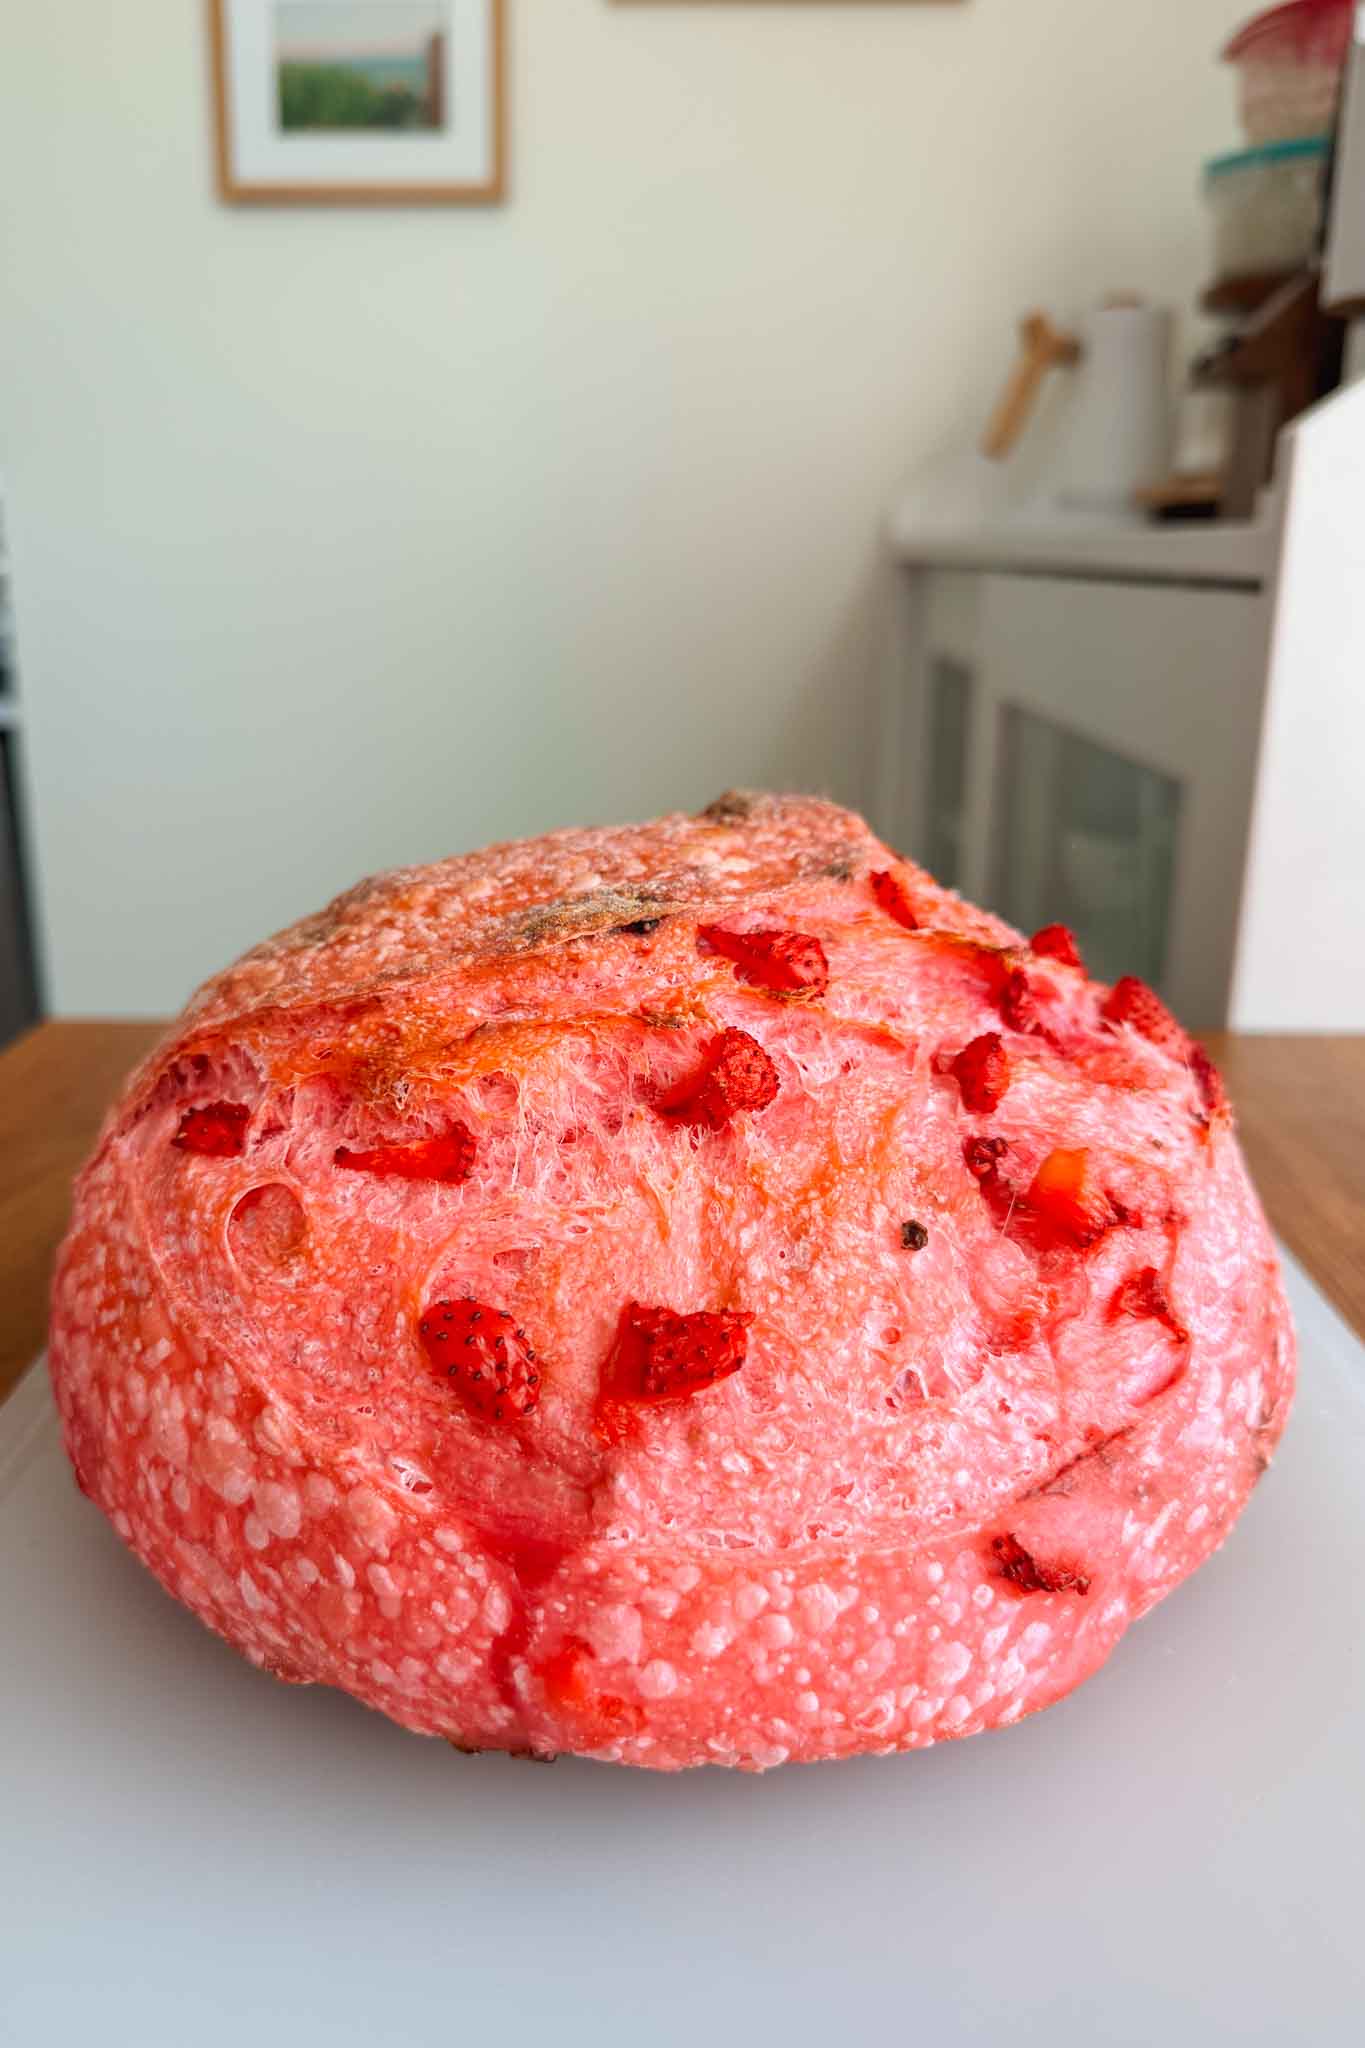
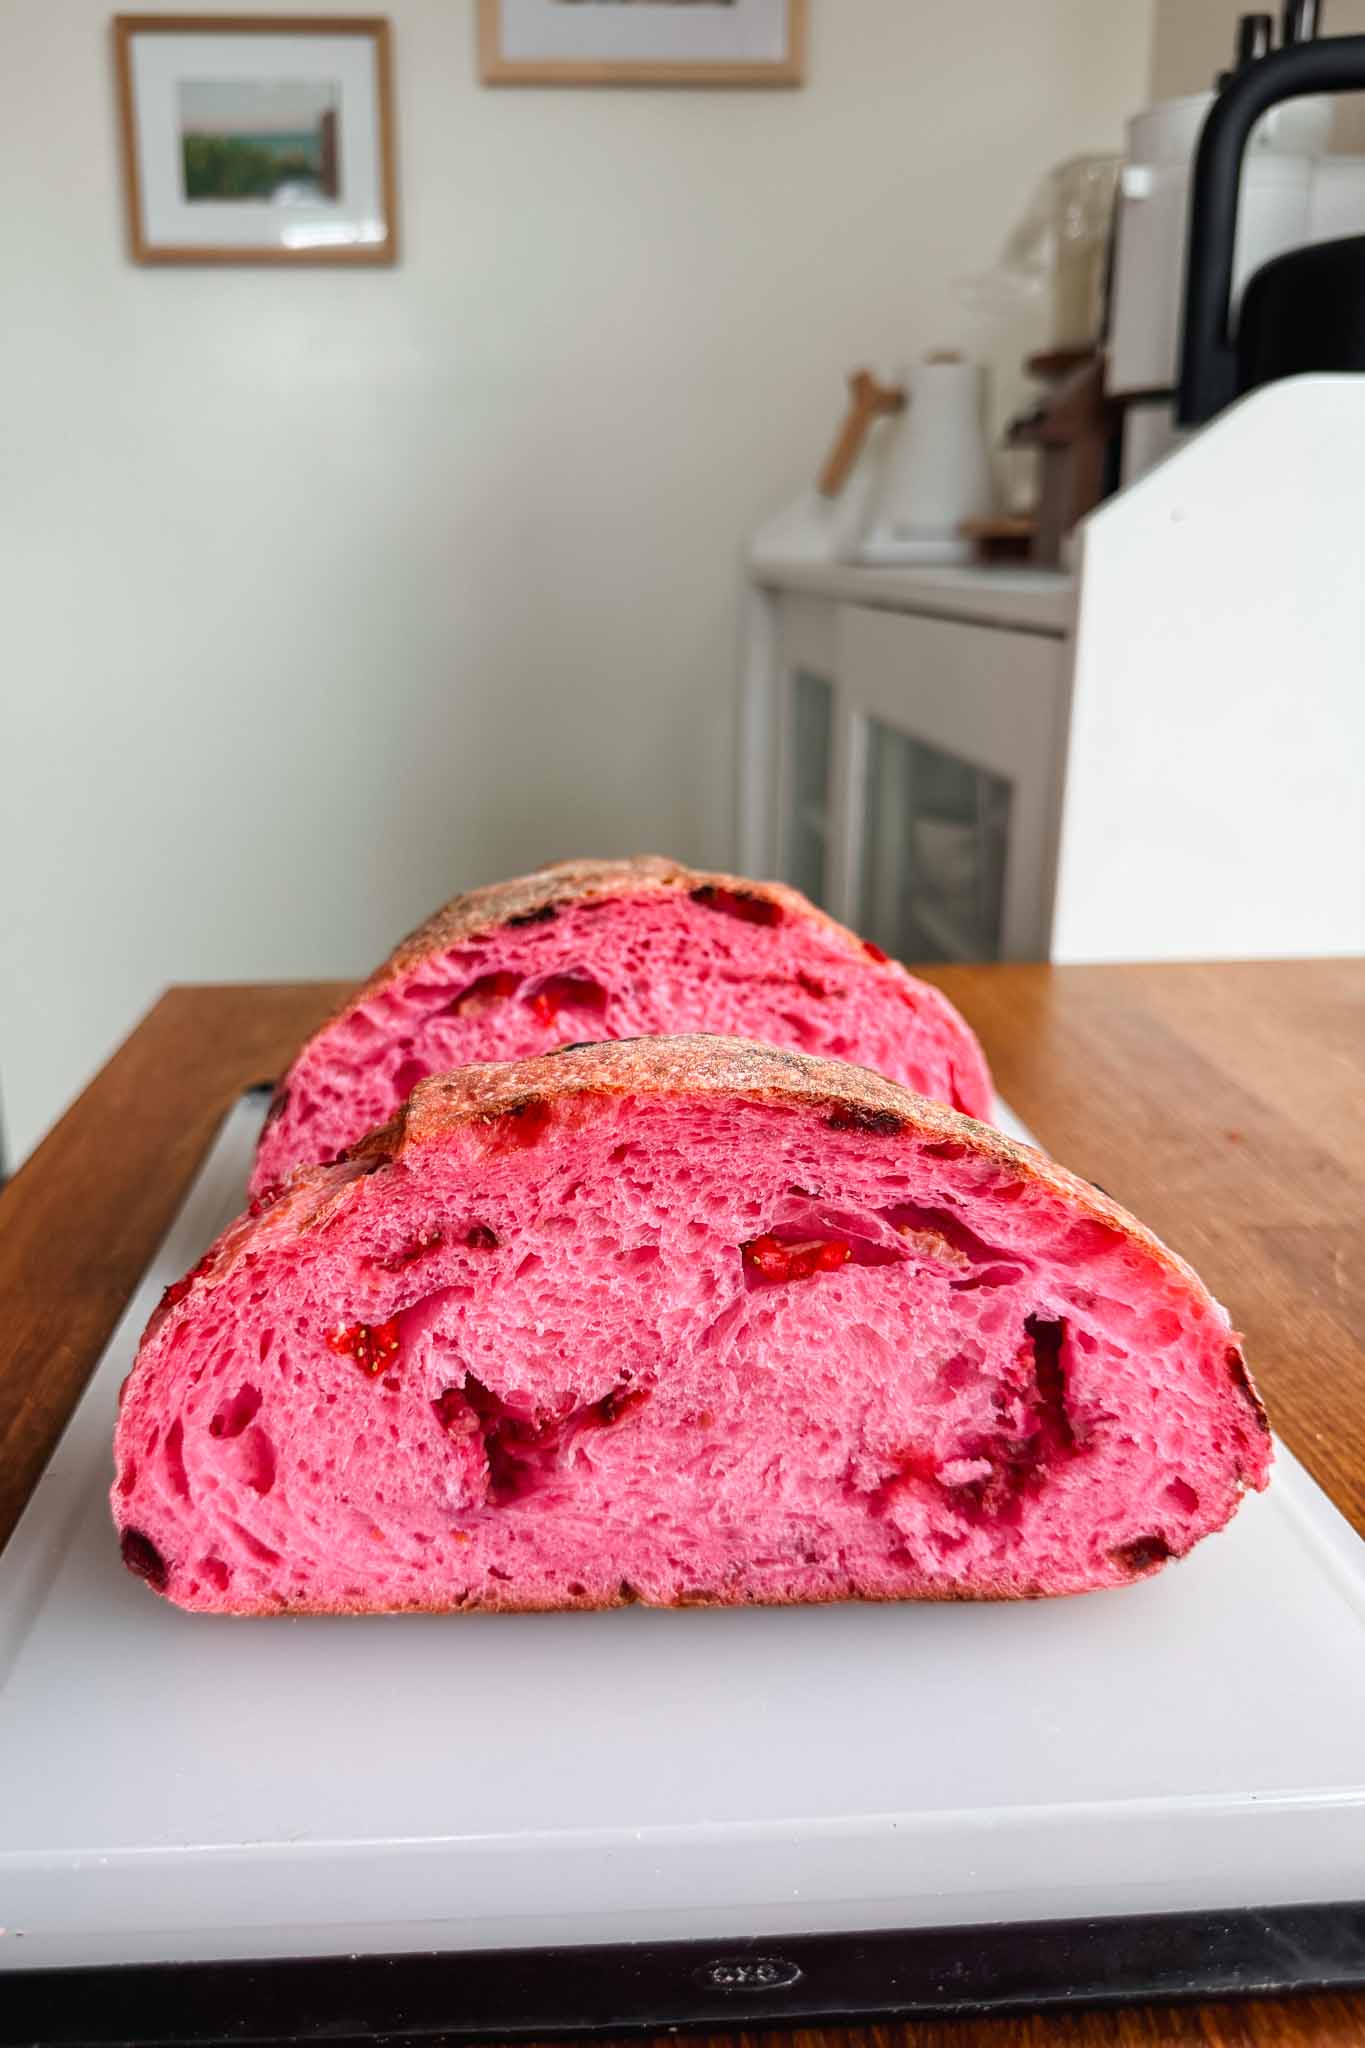
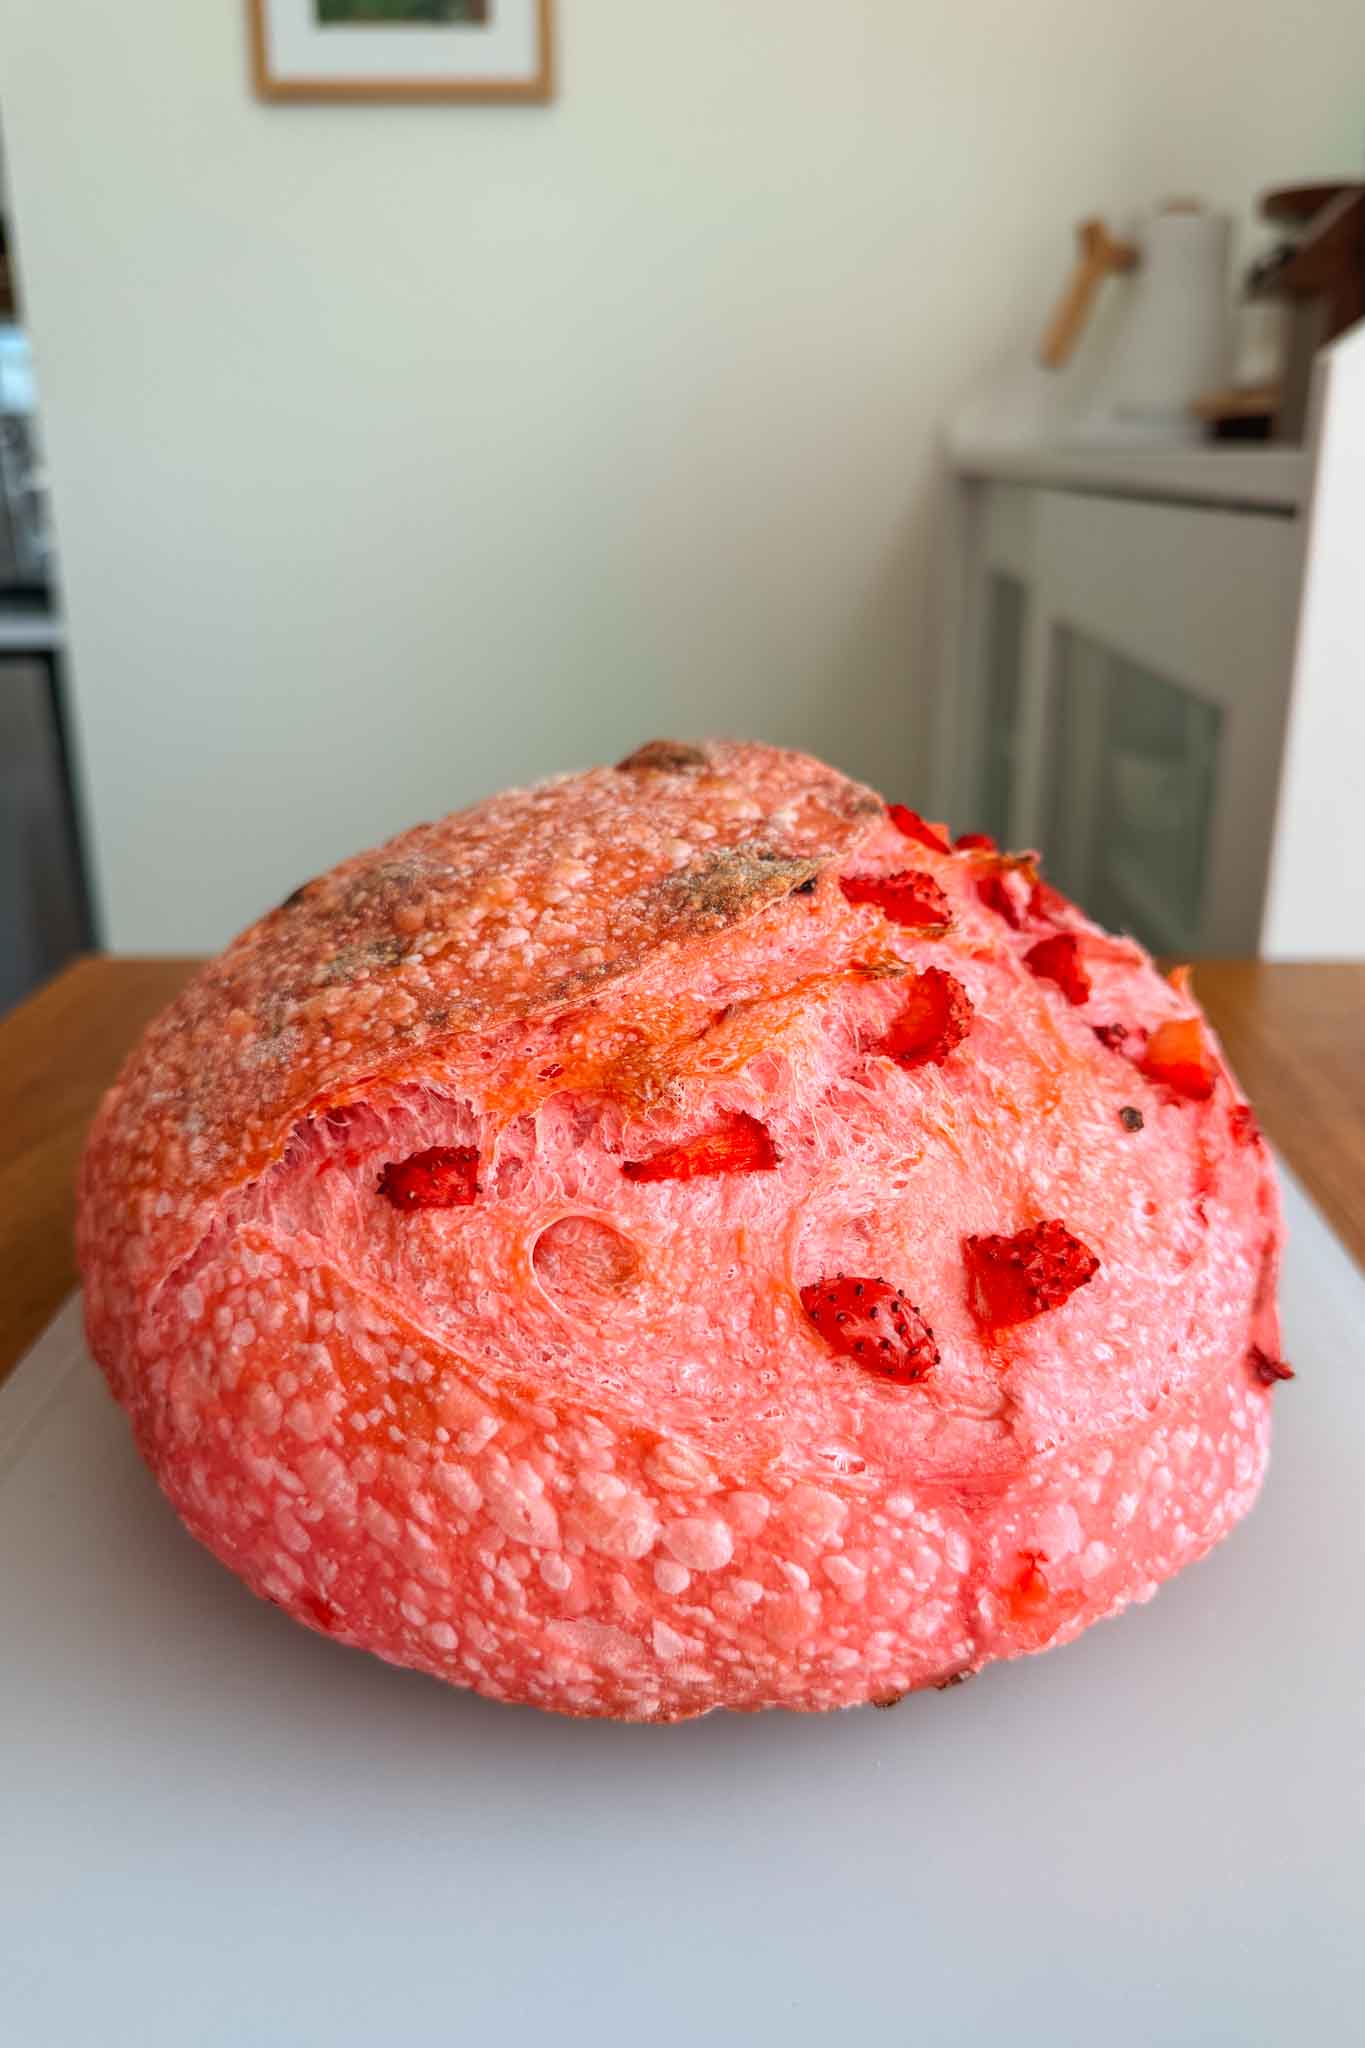
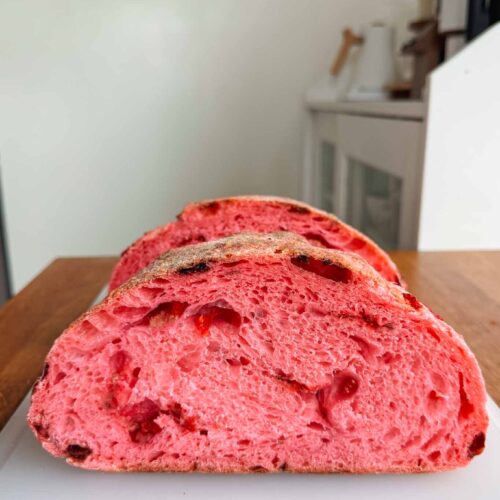
Soft on the inside with a golden, crisp crust and bursts of real strawberries all throughout — this strawberry sourdough bread is naturally sweet and bursting with delicious strawberry flavor in every single bite. Made with a combo of fresh and freeze dried strawberries, it’s so easy to make and bakes up beautifully. With swirls of pink marbling and juicy strawberry pieces on each slice, it’s one of my absolutely favorite recipes and the perfect way to impress any strawberry-lovers!
Looking for more sourdough baking recipes? Check out my Blueberry Sourdough Bread, Classic Sourdough Croissants, or these cute Flower Bagels!
Adapted from my Beginner Sourdough Bread, this recipe combines fresh and freeze-dried strawberries for the perfect balance of flavor, color, and texture. You’ll also utilize a simple technique called lamination to add the strawberries to the dough. The result is a loaf that’s soft and airy on the inside, crisp and golden on the outside, and full of real strawberries. Plus, this recipe calls for a long and slow fermentation process with sourdough starter, so it’s filled with all the gut-healthy benefits of sourdough as well!
Whether you’re new to sourdough or a seasoned baker, this recipe is a fun, vibrant twist on a classic loaf. Follow along step-by-step, and you’ll have a bakery-worthy strawberry sourdough bread that’s as stunning as it is flavorful.
Why You’ll Love Strawberry Sourdough Bread
- Made with real strawberries: This loaf is packed with both fresh, diced strawberries and freeze-dried ones for a sweet, vibrant flavor in every bite.
- Naturally sweet: Lightly sweetened with real fruit and just a hint of sugar, it captures the perfect balance of freshness and flavor without being overly sweet.
- Easy to make: Ideal for beginners, this recipe comes together with a handful of simple ingredients for a fruity loaf that you will love!
- It’s Sourdough: Made with active sourdough starter, this bread rises beautifully and delivers all the gut-healthy benefits of traditional sourdough fermentation.
Watch My Strawberry Sourdough Bread Video
Ingredients for Strawberry Sourdough Bread
Here are all of the ingredients you’ll need to make this strawberry sourdough bread recipe:
- Bread flour: Provides the structure and strength for the dough, creating a soft yet chewy crumb.
- Whole wheat flour: Adds depth of flavor, extra nutrients, and a slightly nutty note that complements the strawberries. This is optional and can simply be replaced with bread flour.
- Water: Room temperature is best to help kickstart fermentation!
- Sourdough starter: Make sure to feed your starter roughly 8 – 12 hours before making the dough so it’s nice and active.
- Fresh strawberries: Add bursts of sweetness and moisture, creating juicy strawberry pockets throughout the loaf. I recommend dicing the strawberries so it’s easier to shape the loaf.
- Freeze-dried strawberries: Intensify the strawberry flavor and create beautiful marbling without adding extra liquid. Here’s a great option you can get on Amazon.
- Salt: Enhances the overall flavor of the bread and helps to control the fermentation process.
- (Optional): Pink food coloring to make the dough pink! Here’s a great all natural plant based food coloring option.
How to Make Strawberry Sourdough Bread
This Strawberry sourdough bread is easy to make! All you need are simple ingredients, some basic kitchen equipment, and everything comes together with minimal hands-on time.
Prepare your sourdough starter
- Feed your sourdough starter: The night before, or about 8 to 12 hours before you plan to mix the dough, feed your sourdough starter. Your starter is active and ready to use when it’s doubled in size, is vigorously bubbly, and has just begun to fall back down from it’s peak height.
Day 1: Mix the dough and first rise
- Mix the dough: In a large bowl, add the water, sourdough starter, and sugar, and whisk together until fully combined. Add the bread flour, whole wheat flour, salt, and optional pink food coloring. Mix together until a dough forms and there are no dry patches. Cover the bowl and let the dough rest for 30 minutes.
- Stretch and fold: After the dough has rested for 30 minutes, perform your first set of stretch and folds. Cover and let the dough rest 60 minutes before performing the next set. Complete a total of 4 rounds of stretch and folds, each one spaced out by 60 minutes during the course of the bulk fermentation in the next step.
- First rise (bulk fermentation): Allow the dough to rise at room temperature for about 6–8 hours. The dough is ready when it has expanded by roughly 50%, looks slightly bubbly on the surface, and has a soft, jiggly texture. Depending on the activity of your starter and the warmth of your kitchen, this process may take up to 8–10 hours.
- Add the strawberries (lamination): Once the dough has finished rising, it’s time to add the strawberries. Lightly mist your work surface with water and turn the dough out onto it. With damp hands, gently stretch the dough into a thin rectangular sheet, about ¼” thick, being careful not to tear it. Sprinkle the freeze-dried strawberries evenly over the surface—I like to use a mix of whole pieces and some crumbled into powder for extra marbling. Then, evenly scatter the diced fresh strawberries across the dough. Fold one side of the dough toward the center, then fold the opposite side over it to create a long rectangle. Starting from the short edge, roll the dough into a loose log. With lightly floured hands, shape the dough into a smooth, round ball by gently dragging it against the work surface to build surface tension. Use a dough scraper to lift and transfer it to a lightly floured, lined proofing basket, seam-side up.
- Proof (second rise): Cover the dough and place it in the refrigerator to proof overnight, or for up to 48 hours. I recommend a minimum of 12 hours, which helps develop deeper flavor and better texture .
Day 2: Score and Bake
- Preheat your oven and Dutch oven: When you’re ready to bake, place your Dutch oven (with the lid on) inside your oven and preheat to 500°F (260°C). Let it heat for 30–60 minutes to ensure it’s fully hot.
- Score your dough: Once preheated, remove your dough from the refrigerator. Lay a sheet of parchment paper over the top, then gently flip the dough onto it so it’s resting on your work surface on top of the parchment. Using a sharp blade or bread lame, score the dough at a 45° angle just beneath the surface. One clean slash along the side works beautifully, but you can experiment with creative scoring patterns too.
- Bake the bread: Carefully remove the Dutch oven from the oven and take off the lid. Lift the dough by the edges of the parchment and gently lower it into the pot. Cover and bake at 500°F for 30 minutes, then remove the lid and bake for another 10–15 minutes, until the crust is a deep golden brown or the internal temperature reaches 208–210°F (97–99°C).
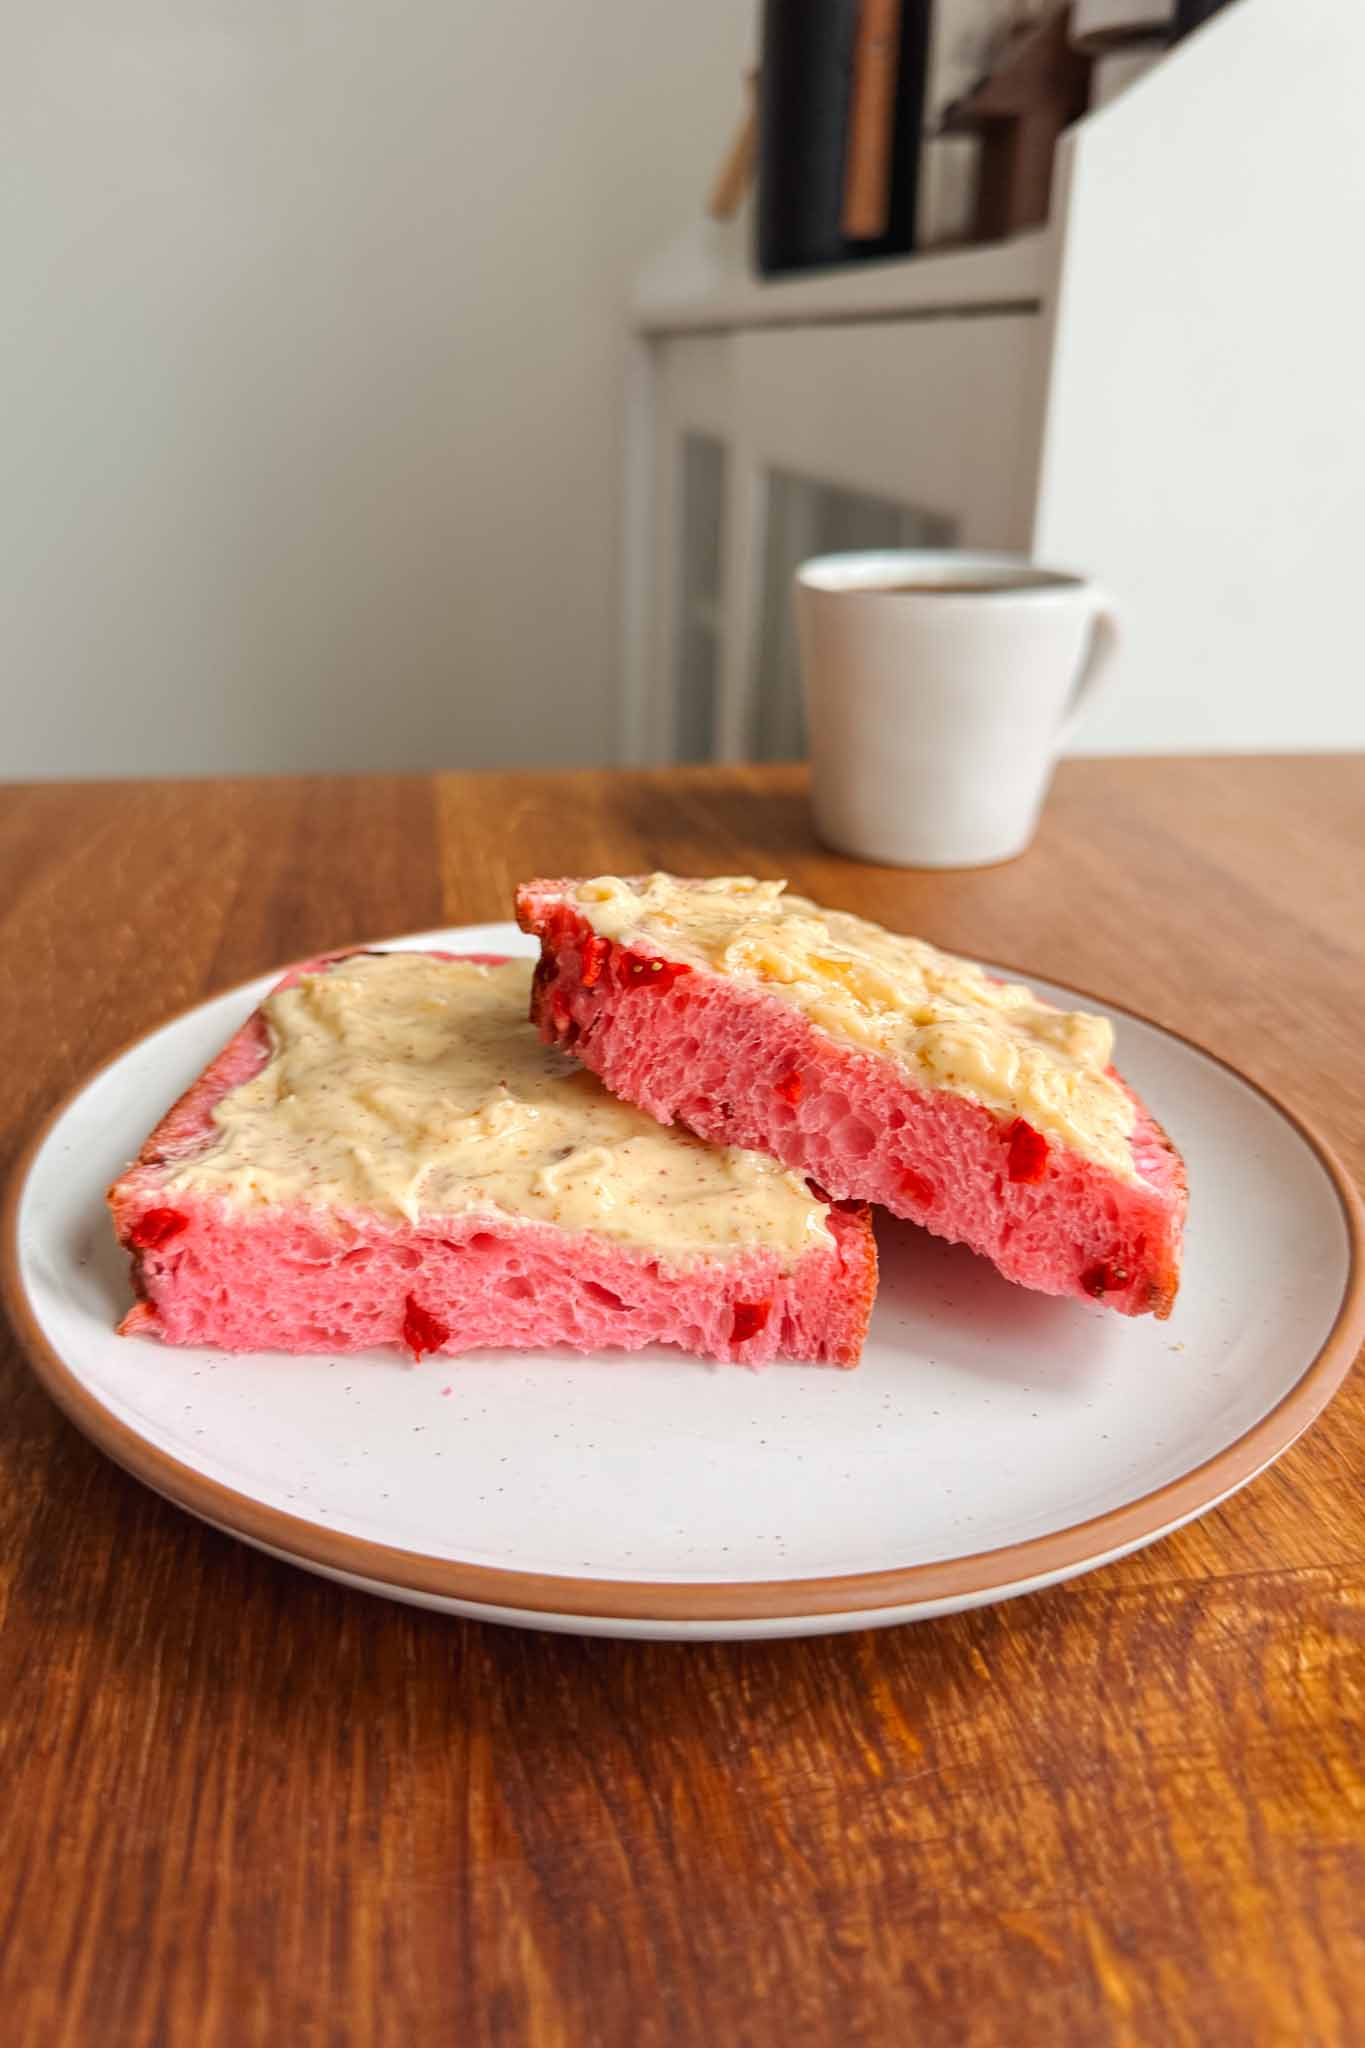
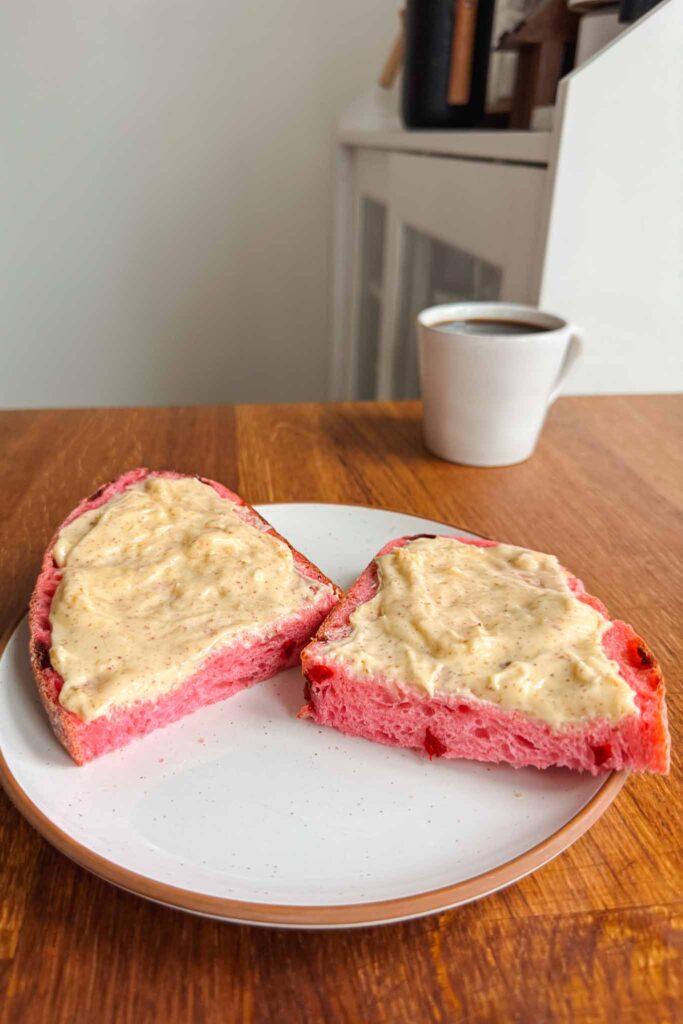
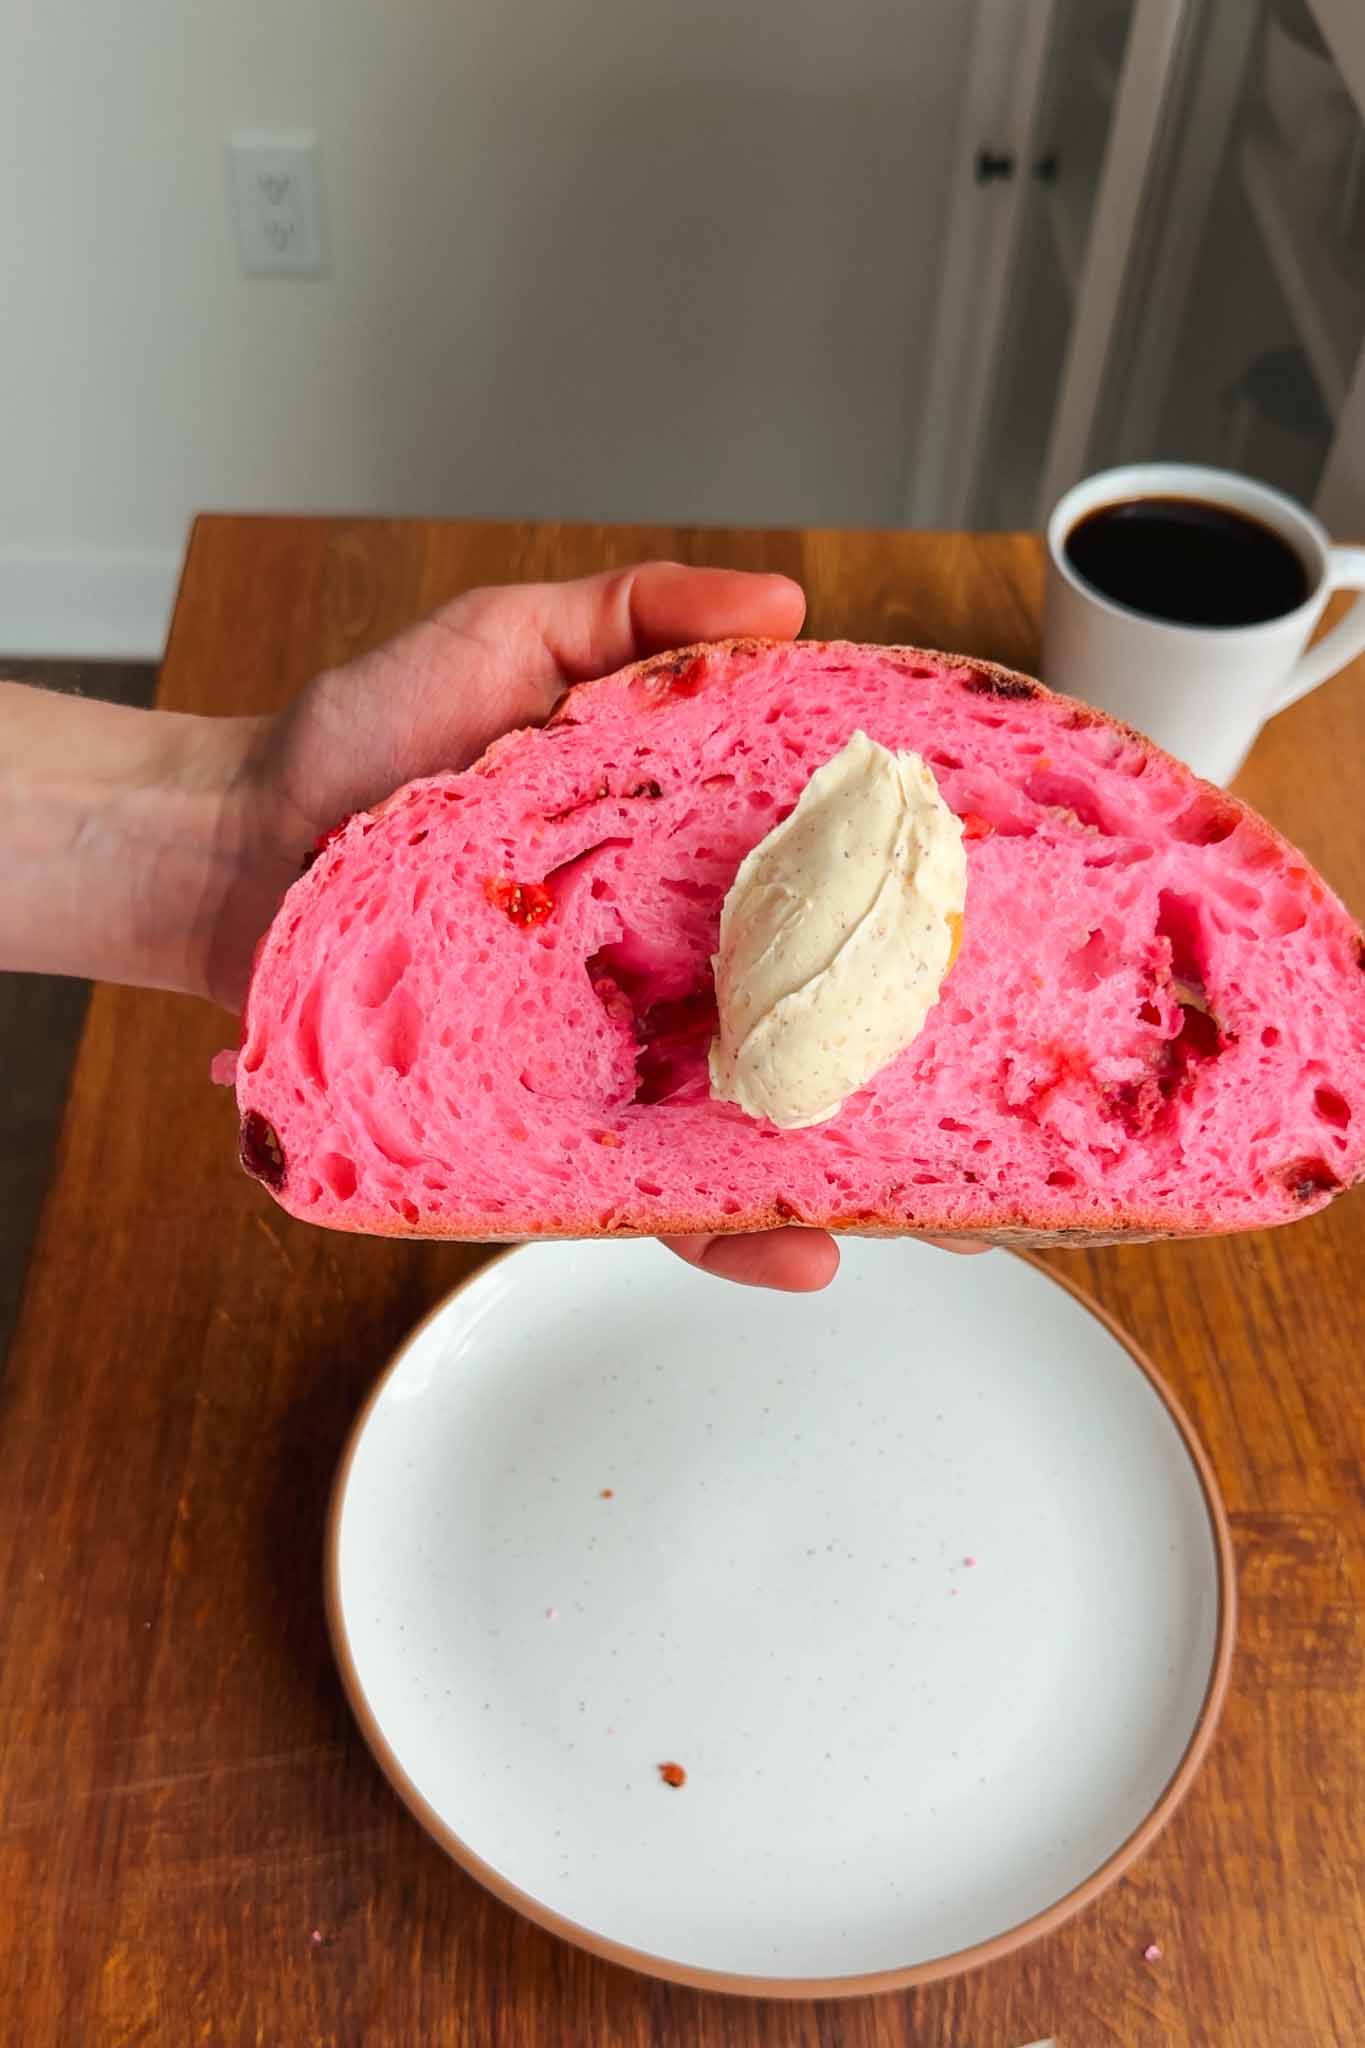
- Cool and serve: Transfer the bread to a wire rack and let it cool completely for 1–2 hours before slicing. Serve your strawberry sourdough with any of your favorite toppings. I loved having mine with some homemade whipped brown honey butter!
Sample Baking Schedule
I love having fresh bread ready for the weekend! Here’s the baking schedule I usually follow to have my dough ready to bake first thing Saturday morning. The cold proof can be extended, so if your timing shifts, you can just as easily bake it later in the day—or even on Sunday!
Thursday Evening (8:00 PM): Feed your sourdough starter with a 50/50 mix of flour and water. It’s ready to use once it’s risen to its peak, looks bubbly, and just starts to fall back down. Don’t stress about exact timing—use these visual cues to tell when it’s ripe and active.
Friday Morning (7:30 AM): Mix the dough and let it rise at room temperature.
Friday Afternoon/Evening (4:30 PM): Transfer the dough to the refrigerator for its cold proof (overnight rise).
Saturday Morning (8:00 AM): Score and bake your bread! There’s nothing better than starting the weekend with a warm, freshly baked loaf.
What is Sourdough Lamination?
Lamination is a technique used to strengthen the dough and evenly incorporate mix-ins—like fruit, nuts, or chocolate—without overworking it. If you love sourdough bread with add-ins (known in bread baking as “inclusions”), then lamination is a fun and easy step you’ll need to learn! The process involves gently stretching the dough into a thin rectangle, about ¼ inch thick, layering in your ingredients, and folding it back up into a neat bundle. Here’s how you do it.
How to laminate with strawberries (step by step):
- Prepare your work surface: Lightly mist a clean work surface with water to prevent sticking. Turn the dough out onto it.
- Stretch the dough: With damp hands, gently stretch the dough into a thin, even rectangle, about ¼ inch thick. Be careful not to tear it.
- Add freeze-dried strawberries: Evenly scatter the freeze-dried strawberries across the surface. Use a mix of whole pieces and some crumbled into powder to create a blend of flavor and color.
- Add fresh strawberries: Next, sprinkle the diced fresh strawberries evenly over the dough so they’re well distributed.
- Fold and roll: Fold one side of the dough toward the center. Next, fold the opposite side over it to form a long rectangle. Starting from the short edge, roll the dough up into a loose log.
What Type of Strawberries Are Best?
For the perfect strawberry flavor and texture, this recipe uses a combination of fresh and freeze-dried strawberries. The fresh strawberries add natural sweetness, juiciness, and little pockets of strawberry pieces throughout the loaf. In contrast, the freeze-dried strawberries intensify the flavor and create beautiful marbling without adding excess moisture. This balance ensures a light, airy crumb that still bursts with strawberry flavor in every bite.
For the fresh strawberries, I recommend dicing them into pieces so it’s easier to shape the loaf once they’re added. I also like using a mix of whole freeze-dried strawberry pieces and strawberry powder. Simply crush about half of the freeze-dried strawberries into a fine powder.
How to Top Your Strawberry Sourdough Bread
Strawberry sourdough bread is soft, subtly sweet, and bursting with real strawberry flavor. It’s the perfect base for so many delicious toppings, and here are some of my favorite ways to enjoy it:
- Whipped Brown Honey Butter – My go-o favorite topping. It’s light, creamy, and slightly sweet, with the most incredible, rich, nutty flavor from the brown butter.
- Honey Cream Cheese – Smooth and tangy with just enough sweetness to complement the fruit. Try adding a sprinkle of flaky salt or lemon zest on top for a fresh twist.
- Mascarpone + Fresh Strawberries – Rich, silky, and luxurious. Layer slices of fresh strawberries over mascarpone and drizzle with honey or balsamic glaze.
- Whipped Ricotta + Honey – Soft, airy, and elegant. A drizzle of honey and a few fresh mint leaves make it feel instantly special.
If You Love This Strawberry Sourdough Bread, Try These Recipes Next:
- Blueberry Sourdough Bagels
- Chocolate Chip Sourdough Cookies
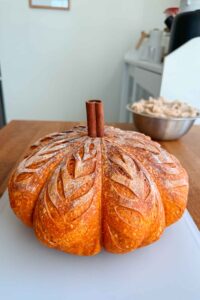
- Pumpkin Shaped Sourdough Bread
- How To Make Cream Cheese
- Sourdough Bagels Recipe
Strawberry Sourdough Bread
Ingredients
- Sourdough Starter
- 20 g (1 tablespoon) active sourdough starter
- 80 g (⅔ cups) flour
- 80 g (⅓ cups) water
Bread Dough
- 475 g (3 ¾ cups) bread flour
- 25 g (3 tablespoons) whole wheat flour
- 360 grams (1 ½ cups) water
- 100 g ½ cup sourdough starter
- 10 g (1 ½ teaspoons) salt
- 30 g (2 tablespoons) sugar
- 120 g ( ¾ cup) fresh strawberries diced
- 30 g (1 ½ oz) freeze dried strawberries a mix of crushed and whole pieces.
- Optional: Pink food coloring to make the dough fully pink
Instructions
Sourdough Starter
- Prepare your sourdough starter: The night before or approximately 8 – 12 hours before you plan on mixing the dough, prepare your sourdough starter. You’ll need 100g of ripe, active starter for this recipe so I recommend reserving 20g (1 tablespoon) of starter and feeding it 80g (⅔ cups) flour and 80g (⅓ cup) water. Your starter is ready to use when it’s doubled in size, bubbly, and has just begun to fall back down from it’s peak height.20 g (1 tablespoon) active sourdough starter, 80 g (⅔ cups) flour, 80 g (⅓ cups) water
Day 1: Make the Dough and First Rise
- Make the dough: In a large mixing bowl, add the water, sourdough starter, and sugar and whisk together until combined. Pour in the flour, salt, and optional food coloring and mix together until a dough forms and no dry patches remain. Cover the bowl and let the dough rest for 30 minutes.475 g (3 ¾ cups) bread flour, 25 g (3 tablespoons) whole wheat flour, 360 grams (1 ½ cups) water, 100 g ½ cup sourdough starter, 10 g (1 ½ teaspoons) salt , 30 g (2 tablespoons) sugar, Optional: Pink food coloring to make the dough fully pink
- Stretch and fold: After 30 minutes have passed, perform one set of stretch and folds. Stretch and folds help to build gluten in the dough, giving it better height, structure, and texture when baked. To perform one set of stretch and folds, begin by adding some water to your hands – this helps prevent sticking. Grab one side of the dough and stretch it up and over towards the middle. Rotate the dough and repeat this with the other side. Repeat with two more times until all 4 sides have been stretch and folded. Let the dough rest for 30 minutes before performing your next round of stretch and folds. During the course of the bulk fermentation in the next step, perform three more complete rounds of stretch and folds, each spaced out by 60 minutes, until you’ve performed a total of 4 sets of stretch and folds.
- First rise: Allow the dough to rise at room temperature for about 4 to 6 hours. The bulk fermentation is complete when the dough has grown by roughly 50% in volume, has air bubbles on top, and is jiggly when shaken. Depending on how active your starter is and the warmth of your kitchen, the rise may take closer to 8–10 hours. Be patient and look use the visual cues to determine when your bread is done rising!
- Add the strawberries (lamination): Once the dough is done rising, it’s time to add the strawberries! Lightly mist your work surface with water and turn the dough out onto it. With damp hands, gently stretch the dough into a thin, rectangular sheet about ¼” thick, being careful not to tear it. Add the freeze dried strawberries and evenly scatter them across the dough. I like to add whole pieces and then crumble some of them over the dough so there is a mix of pieces and powder. Next, add the diced strawberries make sure they’re evenly distributed across the surface. Fold one side of the dough toward the center, then fold the opposite side over it to form a long rectangle. Starting at the short end, roll the dough up into a loose log and place it back into the bowl. Cover and let it rest for another 60 minutes. With lightly floured hands, shape the dough into a smooth, round ball by gently dragging it across the work surface to create tension on the surface. Use a dough scraper to carefully lift the dough and transfer it to a lightly floured, lined proofing basket, placing it seam-side up.30 g (1 ½ oz) freeze dried strawberries, 120 g ( ¾ cup) fresh strawberries
- Proof the dough (second rise): Cover the dough and refrigerate it overnight, or up to 48 hours. I recommend proofing for at least 12 hours because the long cold proof helps develop flavor and improve the texture and structure of the baked bread. The extended fermentation time gives time for the beneficial bacteria in your sourdough starter to work their magic and unlock the gut healthy benefits of sourdough!
Day 2: Shape, Score, and Bake the Bread!
- Preheat the oven and Dutch oven: When you’re ready to bake, place your Dutch oven (with the lid on) inside your oven and preheat it to 500°F for 30 minutes to 1 hour. Make sure it’s thoroughly heated before baking — a hot Dutch oven is key for achieving great oven spring and a beautiful crust.
- Score the bread: When your Dutch oven is fully preheated, take the dough out of the fridge. Lay a sheet of parchment paper over the top of the dough and the proofing basket, then gently turn the dough out onto your work surface so it’s on top of the parchment. Using a bread lame or sharp knife, make at cut in the dough at a 45° angle—just deep enough to cut through the outer skin. I usually make one clean, long slash across the surface, but you can also make a plus sign, “+” but making 2 straight cuts.
- Bake: Carefully remove your preheated Dutch oven from the oven and take off the lid. Lift the dough by the edges of the parchment paper and gently lower it into the pot. Cover with the lid and bake at 500°F for 30 minutes. Then remove the lid and continue baking for another 10–15 minutes, until the crust is deep golden brown or the internal temperature reaches 208–210°F. Transfer the loaf to a cooling rack and let it cool completely for 1–2 hours before slicing.
- Enjoy! Slice into your beautiful strawberry sourdough bread and serve it with any of your favorite toppings. I love mine with a thick spread of homemade whipped vanilla honey butter!