

Funfetti Sourdough Bread

by sourdoughjesha on March 6, 2026
This colorful Funfetti Sourdough Bread is delicious and festive! Filled with rainbow sprinkles and a hint of vanilla, it’s the perfect celebration loaf for birthdays or any special occasion. Ideal for beginners and advanced bakers alike!
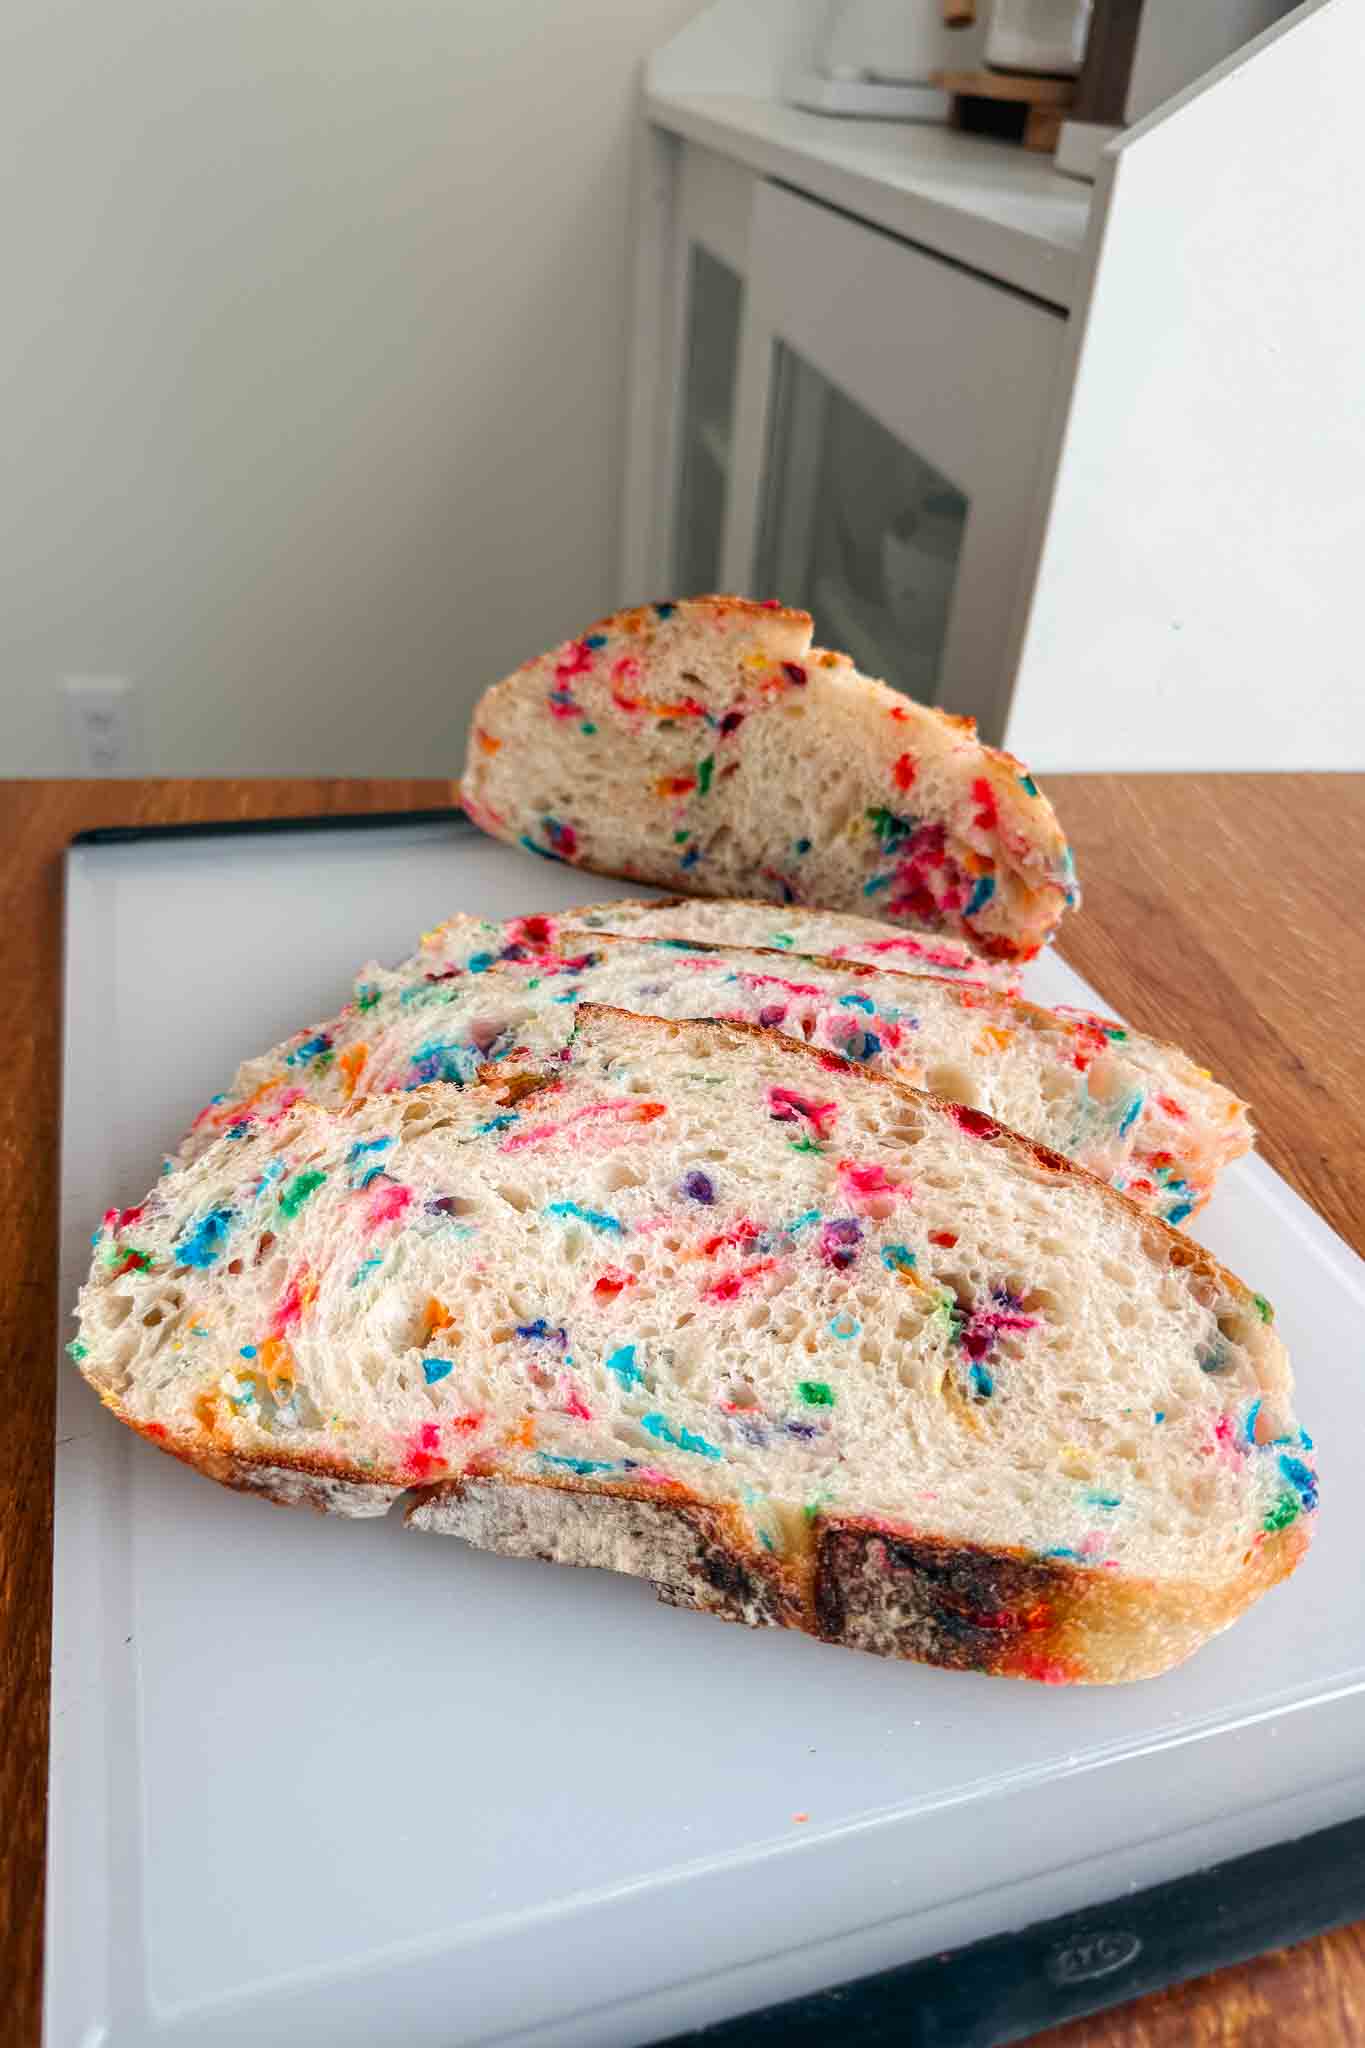
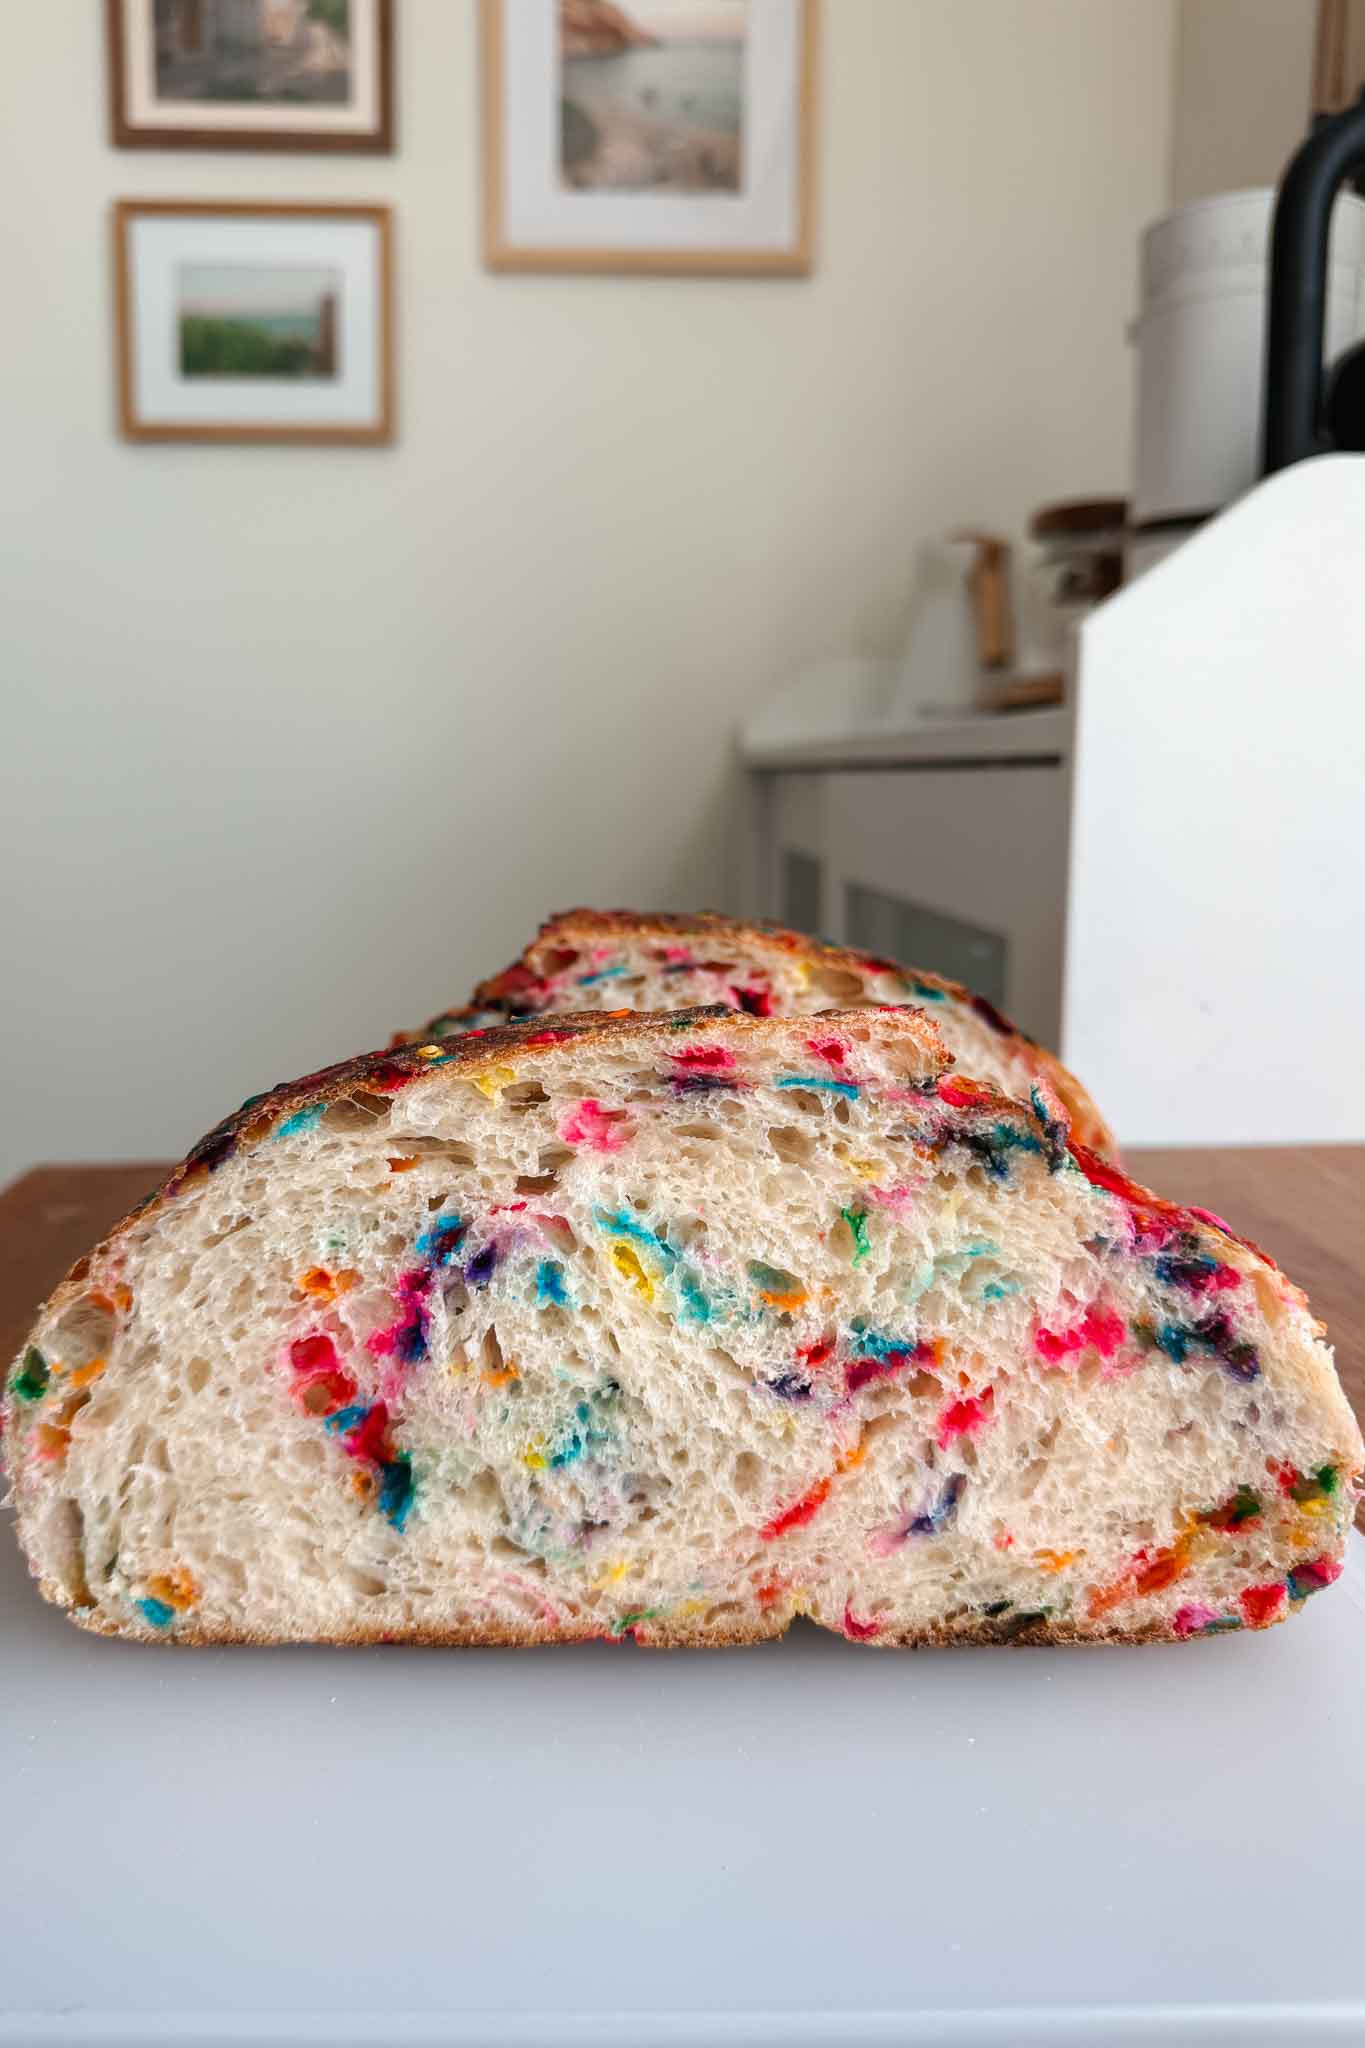
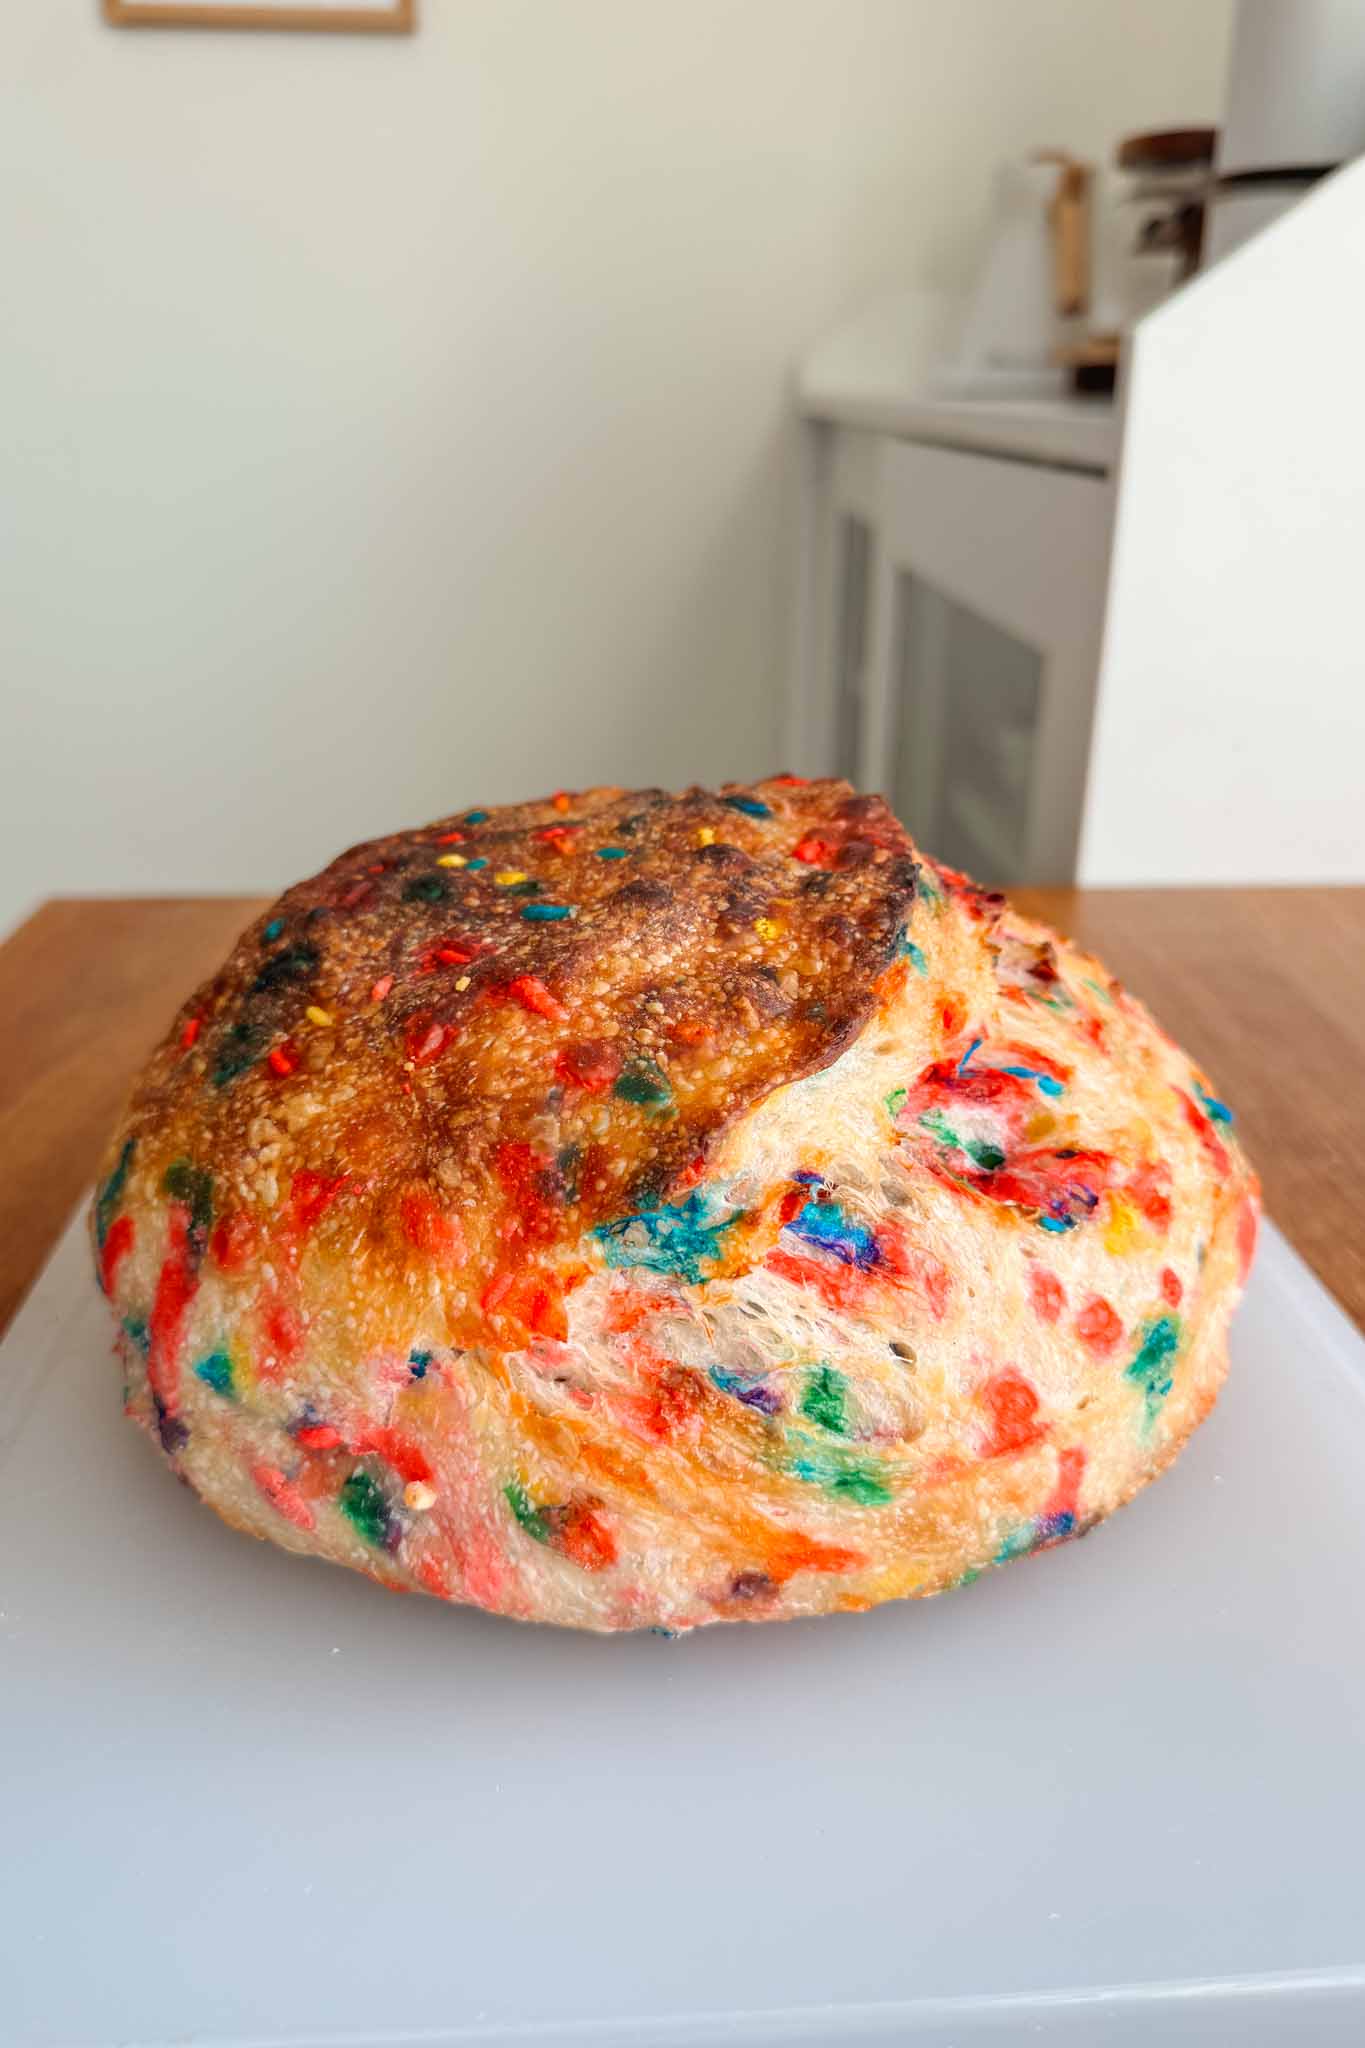
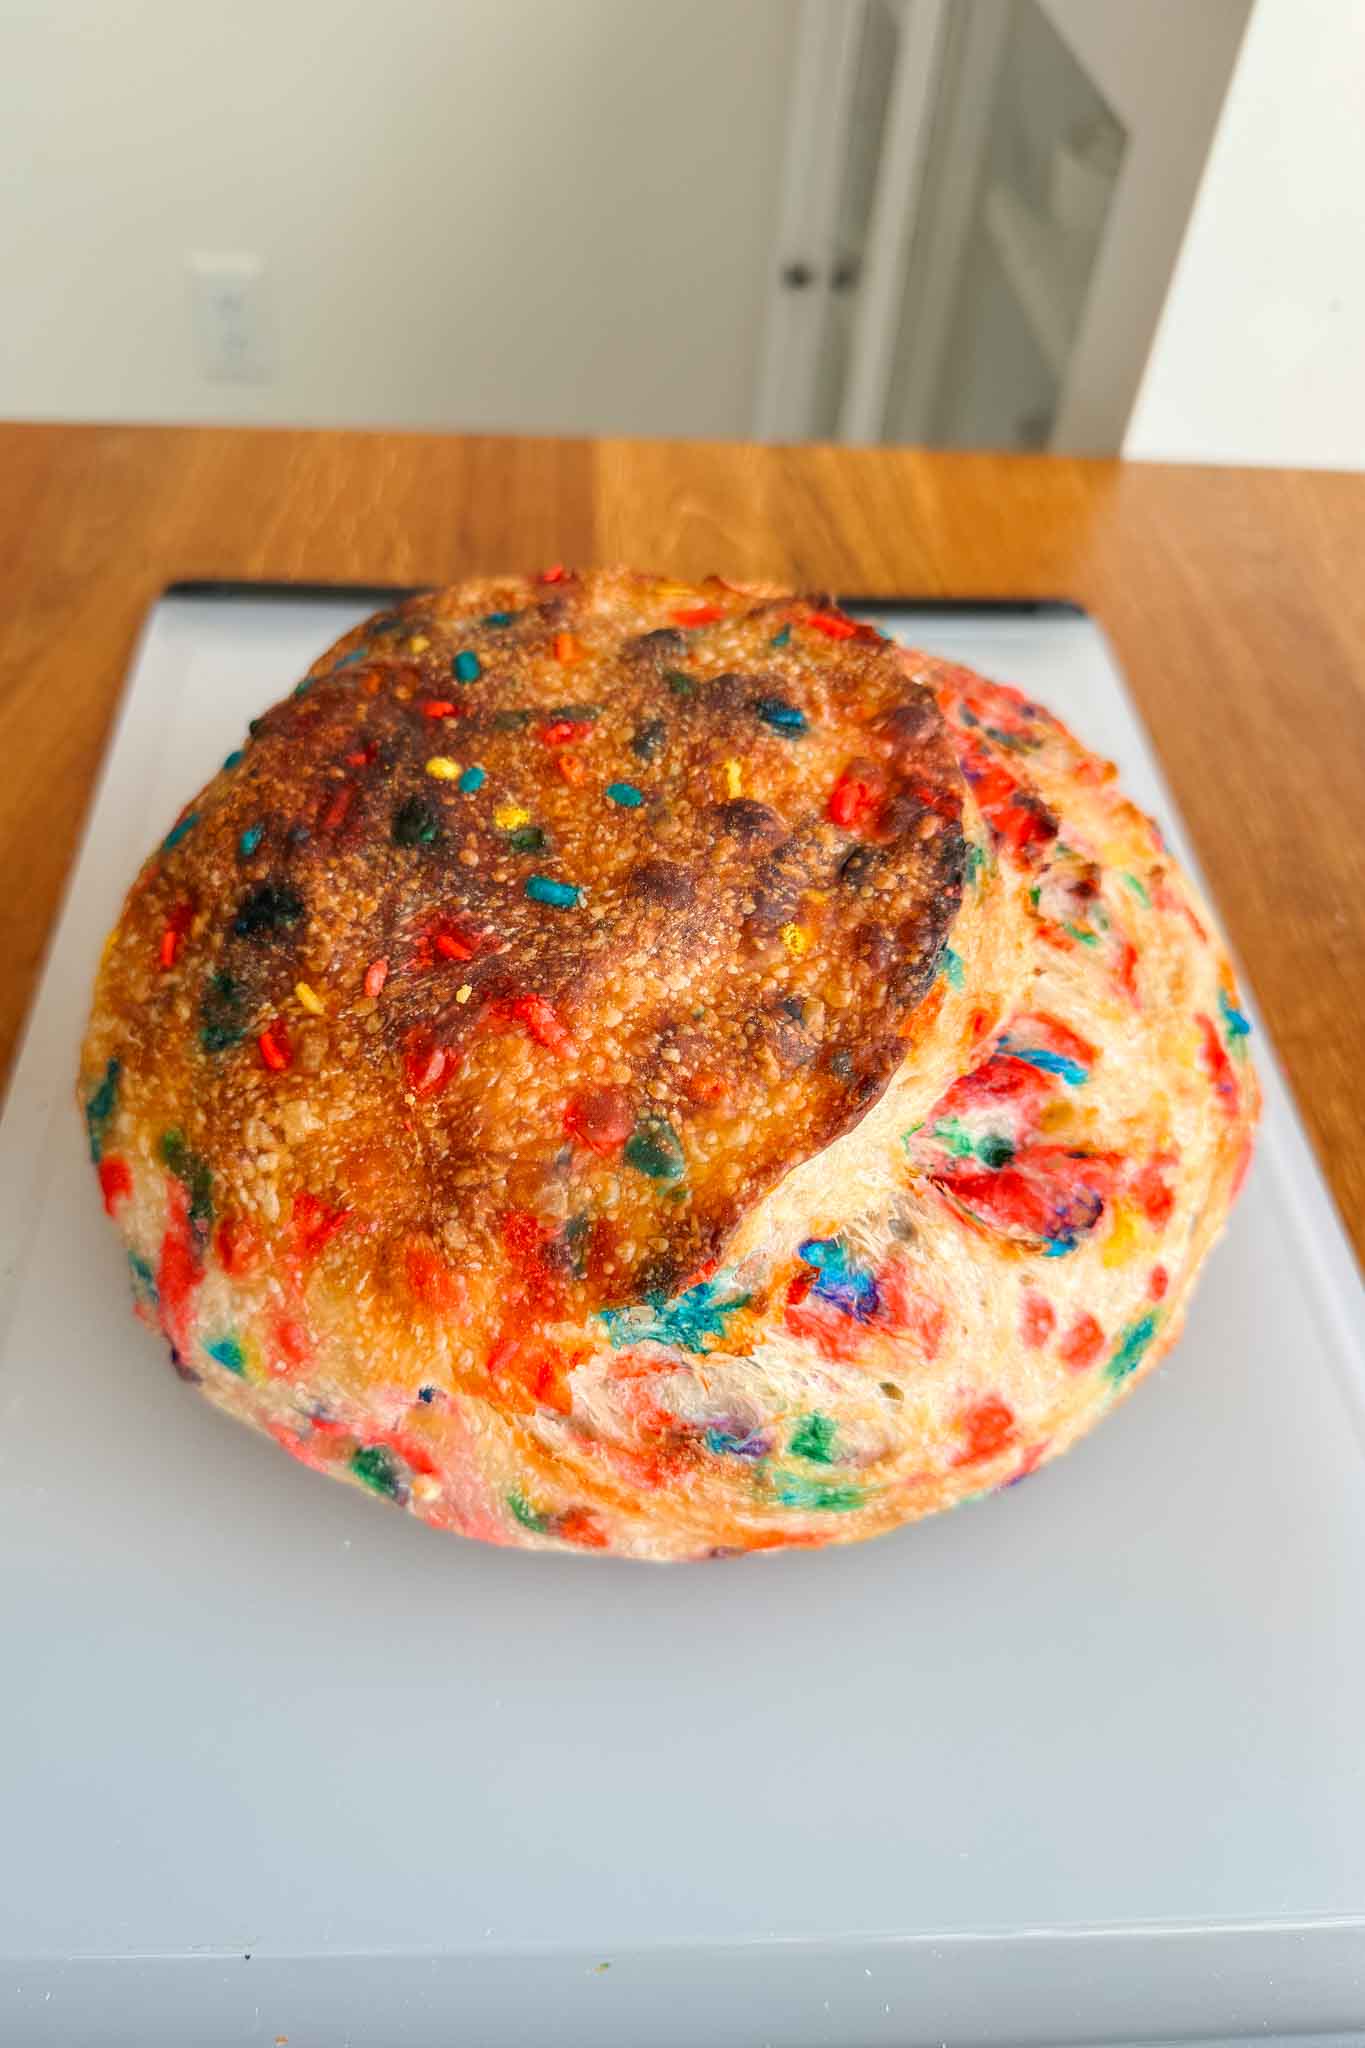
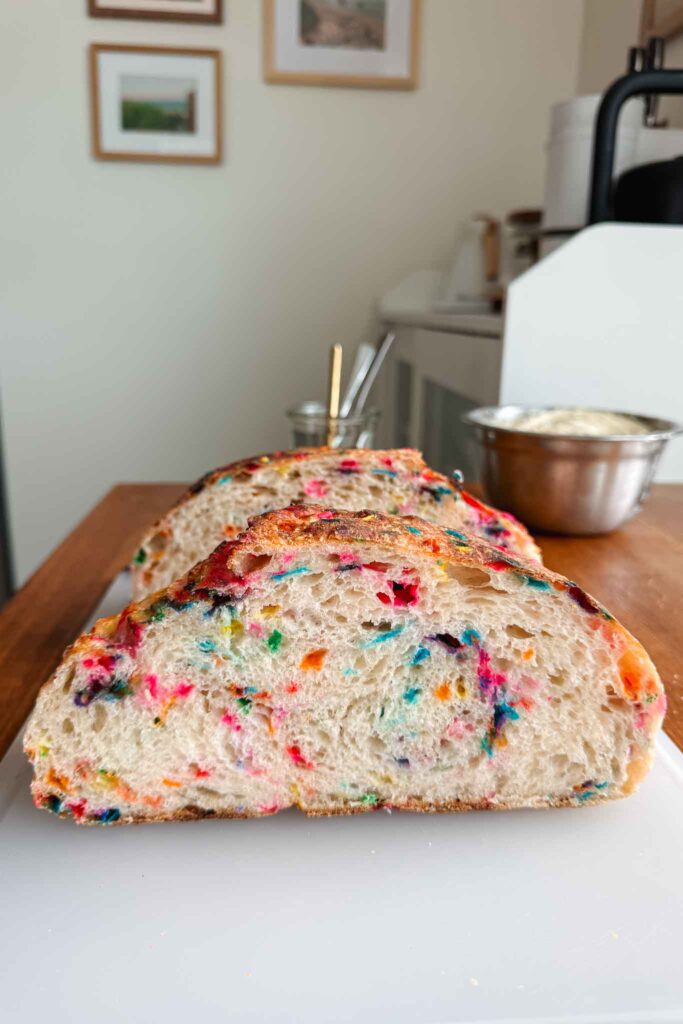
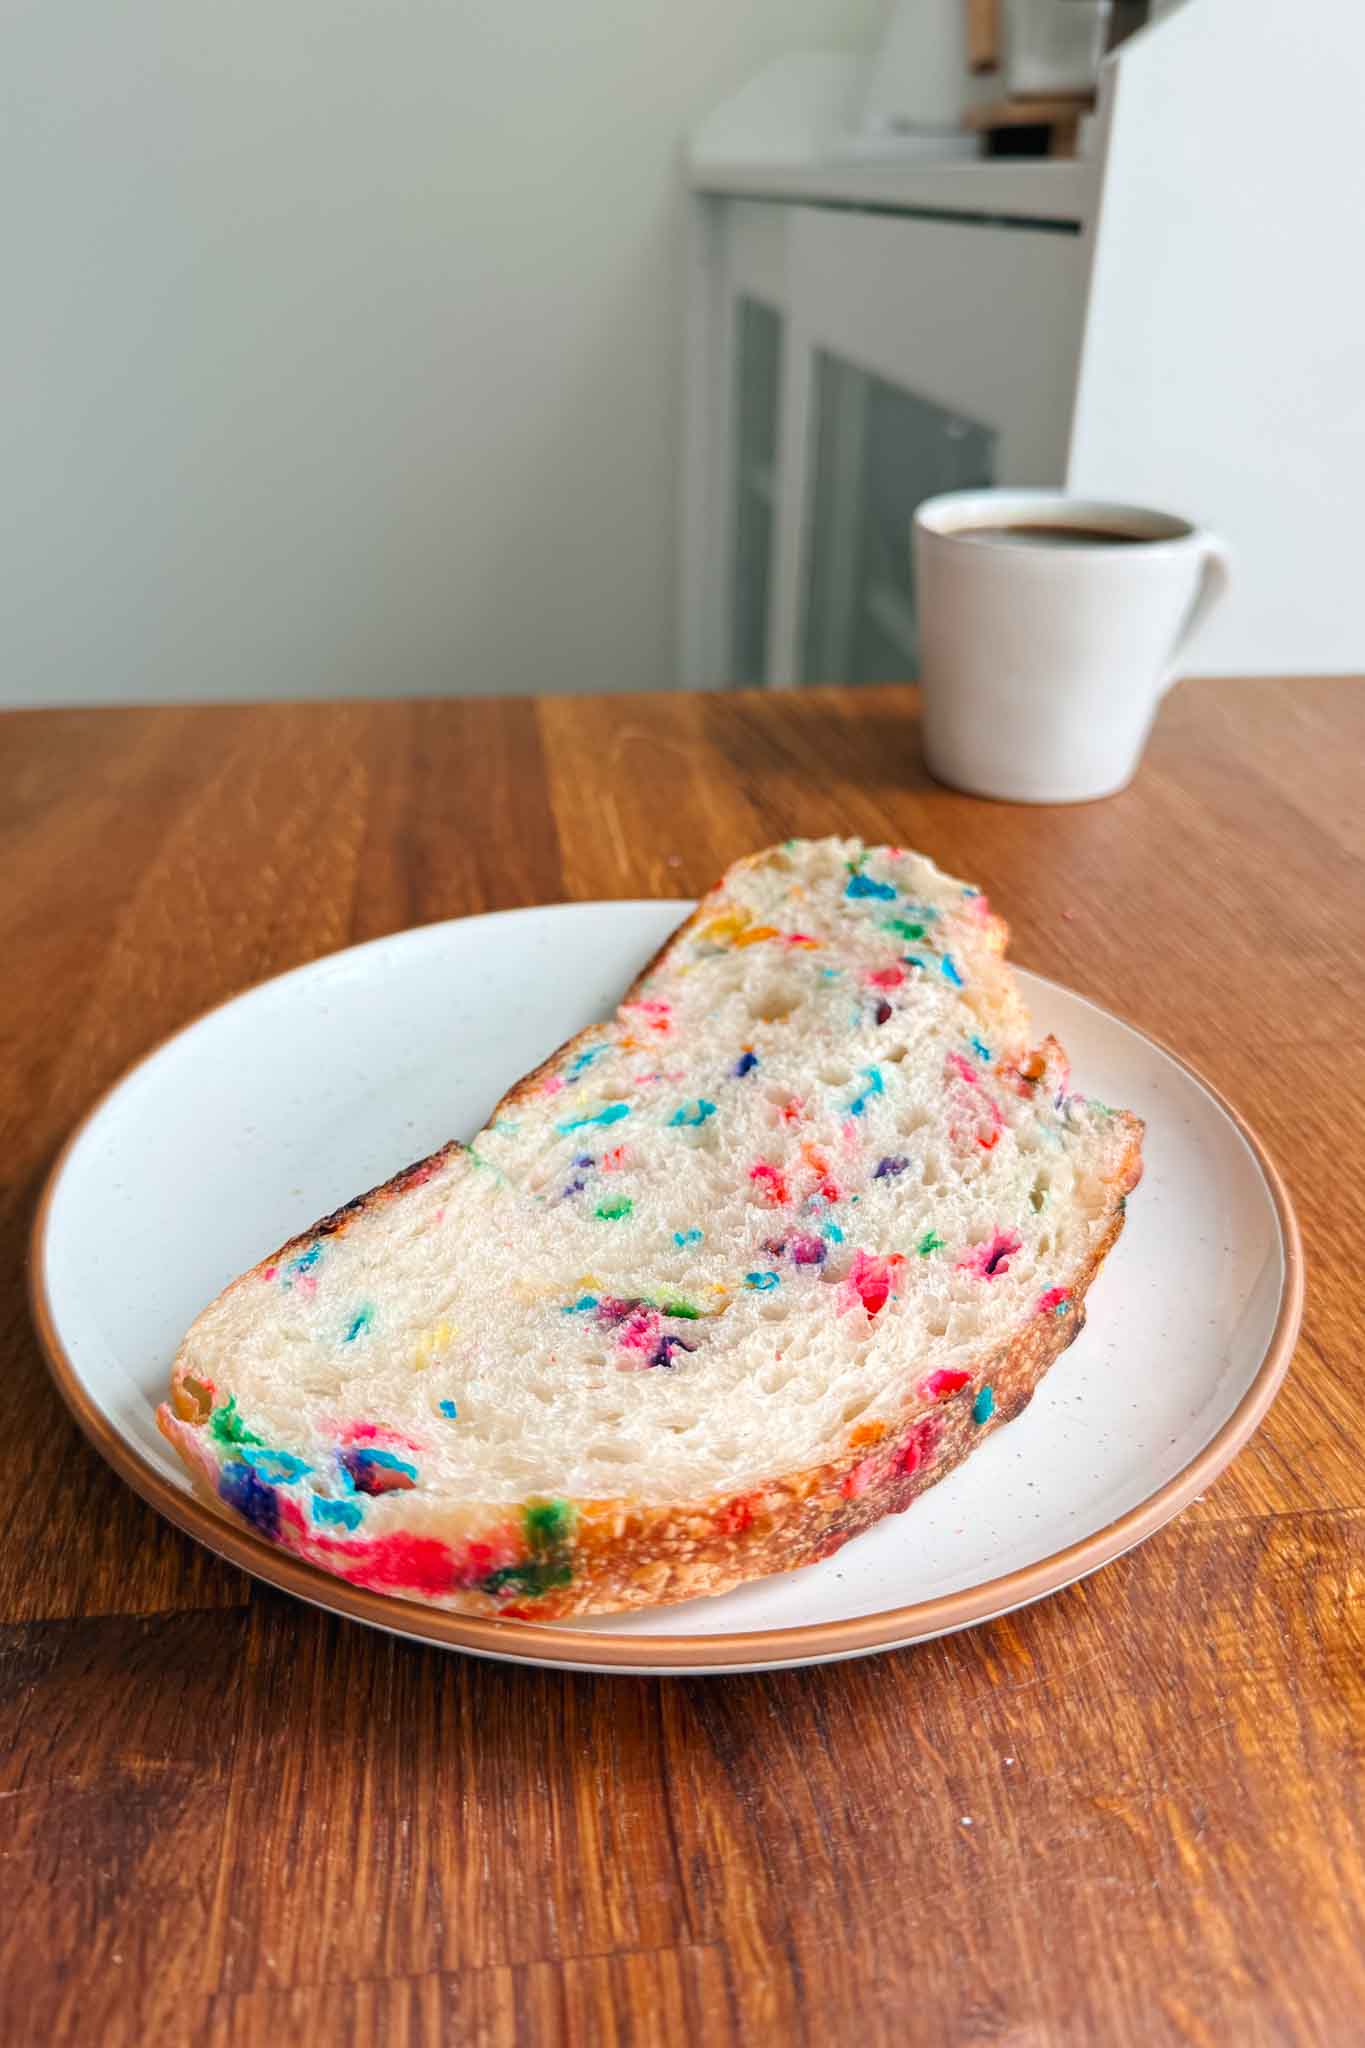
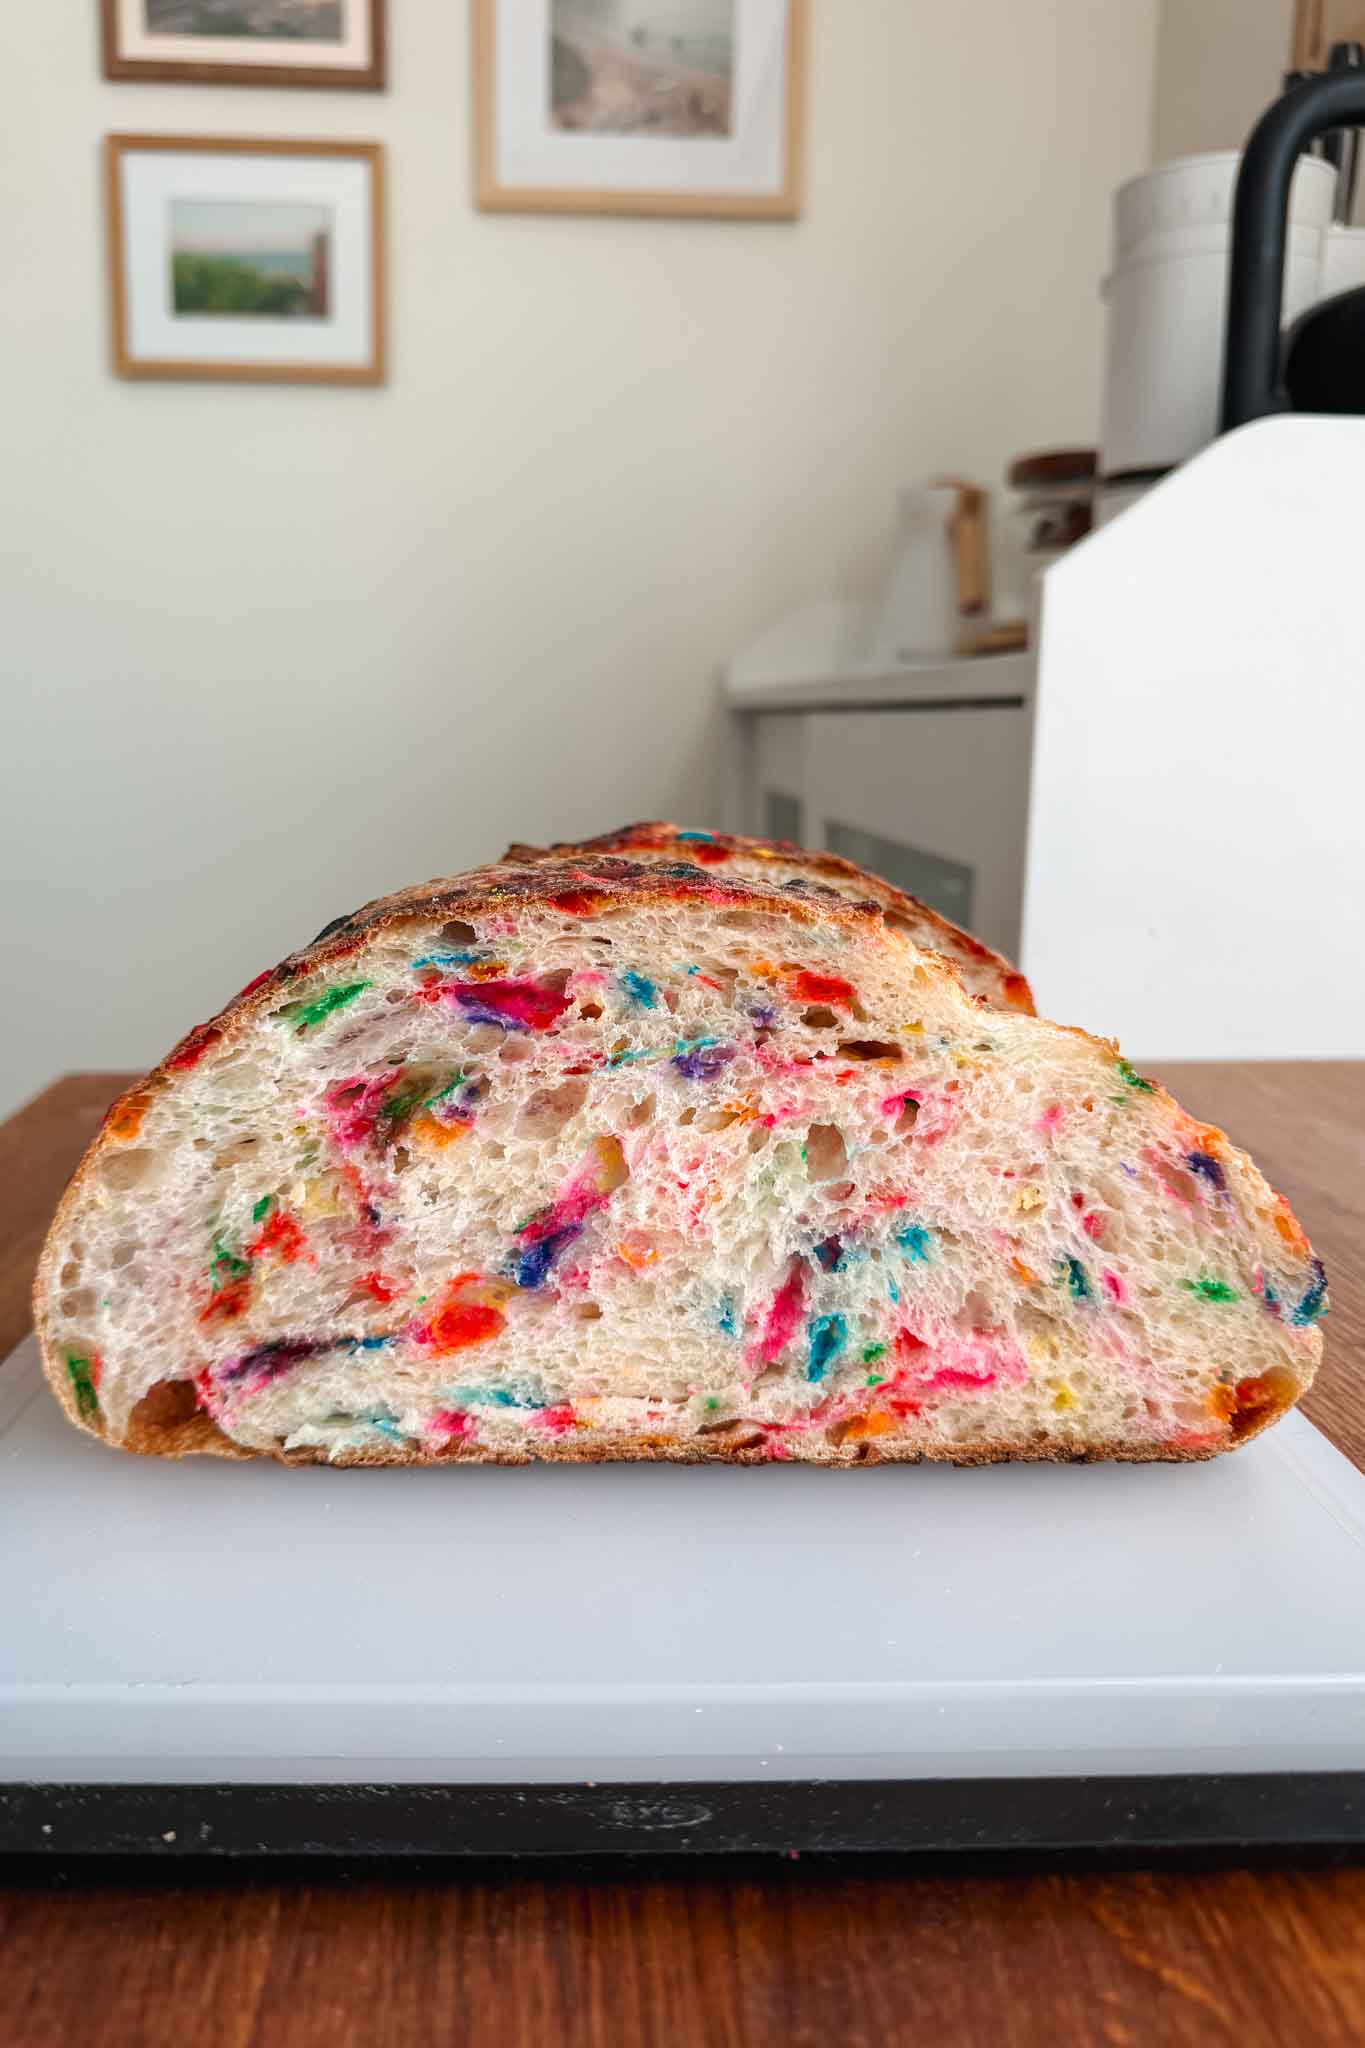
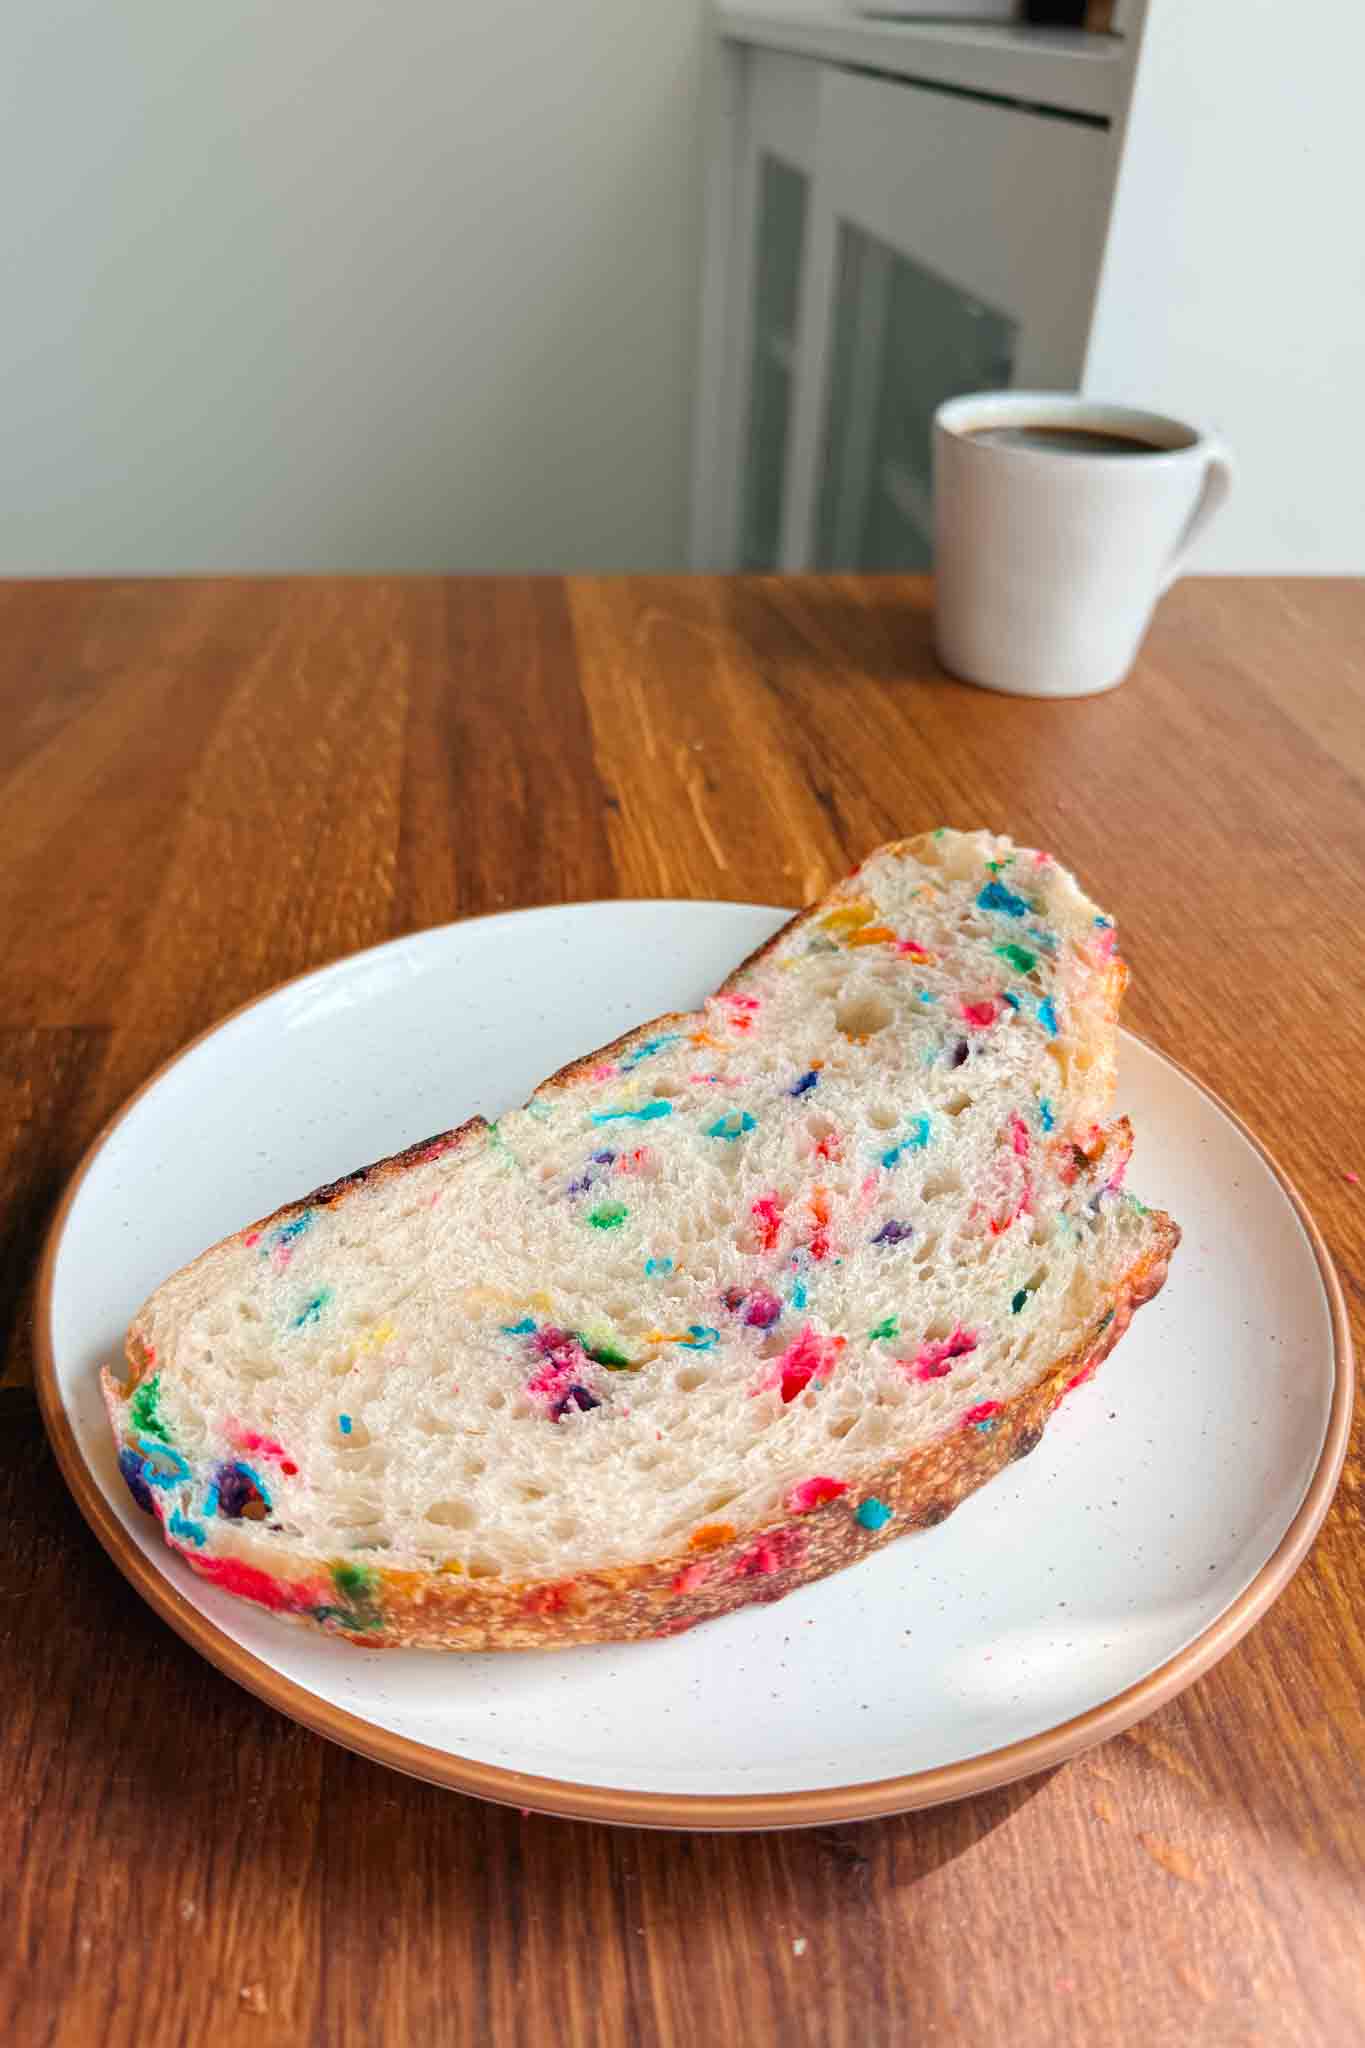
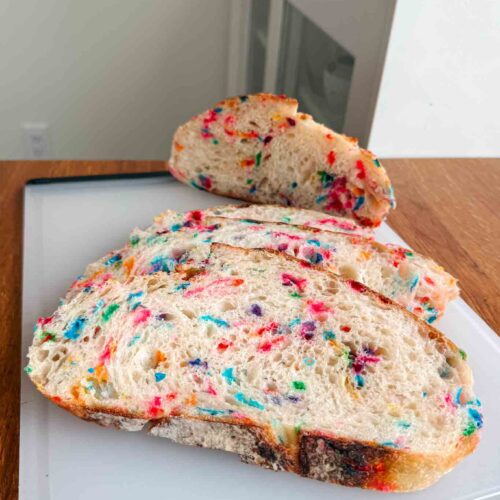
Soft on the inside with a crisp golden crust and colorful rainbow sprinkles throughout, this Funfetti Sourdough Bread is the ultimate playful twist on classic sourdough. Lightly flavored with vanilla and packed with sprinkles, it’s like a funfetti cake in artisan bread form! Every slice is dotted with bright pops of color, making it perfect for birthdays, celebrations, or any occasion that calls for something a little extra fun.
Even better, this funfetti sourdough bread is completely beginner-friendly and follows the same simple process as my Beginner Sourdough Bread recipe. The sprinkles are folded into the dough gradually during fermentation so they stay vibrant and evenly distributed throughout the loaf, creating a beatuiful rainbow-speckled crumb — no clumping or messy streaks!
Don’t have a sourdough starter yet? You can learn how to make your own sourdough starter from scratch with my beginner-friendly guide. And if you’re looking for more sourdough recipes, try my Strawberry Sourdough Bread, Blueberry Sourdough Bread, and Easy Sourdough Bagels next.
Why You’ll Love Funfetti Sourdough Bread
- Perfect for celebrations: This celebration sourdough loaf is the perfect recipe for birthday parties, holidays, or any festive occasion. You can even adjust the color scheme to match different themes!
- Beginner-friendly: This recipe is easy to make and perfect for beginner bakers. It’s almost the same process as my beginner sourdough bread recipe, just with the addition of sprinkles!
- 100% Sourdough: This bread is naturally leavened with sourdough starter, so it’s just as delicious as it is pretty and festive!
- Rainbow-speckled: This sourdough loaf is beautifully speckled with rainbow sprinkles all throughout— like funfetti cake, but reimagined as sourdough bread. I’ll show you exactly how to fold them in so they’re evenly distributed throughout the dough, with pops of color in every slice.
Watch My Funfetti Sourdough Bread Video
Ingredients for Funfetti Sourdough Bread
- Bread flour: Bread flour gives this loaf structure and chew. Its higher protein content helps develop strong gluten, which is especially important when baking artisan sourdough bread. I like to use King Arthur’s bread flour.
- Sourdough starter: An active, bubbly starter is required for this recipe. Make sure to feed your starter the night before or roughly 6-12 hours before you plan on mixing the dough.
- Water: This recipe calls for slightly less water than my classic sourdough bread because the sprinkles realease some moisture into the dough.
- Salt: Salt is key! It adds flavor and helps to slow down the fermentation process so you achieve a propper rise and cold proof.
- Rainbow sprinkles: For the best results, use waxy rainbow jimmies like these. They hold their color beautifully in the dough and create those vibrant rainbow speckles throughout the loaf. Natural sprinkles can work as well, but they tend to bleed more and lose their color when baking, which can change the final look of the bread.
- Vanilla extract: Vanilla extract adds the perfrect subtle hint of vanilla flavor to the bread!
How to Make Funfetti Sourdough Bread
Feed Your Sourdough Starter
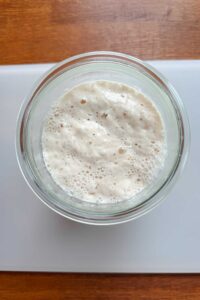
Step 1: Feed your sourdough starter. Start by feeding your starter 6 to 12 hours before you plan to mix the dough so it’s active and bubbly. I typically feed my starter the night before so it’s doubled and perfectly ripe by morning. Your sourdough starter is ready when it’s roughly doubled in size, is vigorously bubbly, and has just begun to fall back down below it’s peak.
Mix the Dough
Step 1: Mix the dough. In a large bowl or the bowl of a stand mixer, add the water and active sourdough starter and whisk together. Pour in the flour, salt, and vanilla. Mix until a shaggy dough forms and no dry flour remains. Cover the bowl and let the dough rest for 30 minutes.
Bulk Fermentation and Add Sprinkles
Step 3: First rise. Transfer the dough to a bowl, cover, and let it rise at room temperature until it increases in volume by about 50%. This usually takes around 6–8 hours, depending on the temperature of your kitchen and strength of your sourdough starter. The bulk fermentation is complete when the dough looks airy, has bubbles on the surface, and jiggles when the bowl is gently shaken. During the first rise you will also be performing a series of stretch and folds and incorporating the sprinkles, as outlined in the following steps.
Step 4: First Stretch and fold. Once the dough has rested for 30 minutes after the initial mixing in Step 1, it’s time to perform your first set of stretch and folds. With lightly damp hands, lift one side of the dough, gently stretch it upward until you feel resistance, then fold it back over the center. Turn the bowl and repeat this motion on the remaining sides until you’ve gone all the way around the dough. Cover the bowl and allow the dough to rest for another 30 minutes.
Step 5: Add the sprinkles. Scatter about one-third of the sprinkles evenly over the surface of the dough. Perform another round of stretch and folds to gently incorporate the sprinkles into the dough. Cover and let the dough rest for another 30 minutes. Repeat this process two more times, adding the remaining sprinkles in thirds so they become evenly distributed. By the end, you will have completed a total of four sets of stretch and folds. Let the dough continue rising until it has increased in volume by about 50%, looks airy, and jiggles slightly when the bowl is shaken, with small bubbles visible on the surface.
Shape the Dough
Step 6: Shape the dough. Once bulk fermentation is complete, it’s time to shape your loaf. Prepare your proofing basket by lining it with a towel or liner and dusting it lightly with flour. Lightly flour your work surface and the top of the dough, then gently turn the dough out so the floured side is facing down. The dough should naturally form a loose rectangular shape.
To shape, fold the bottom third of the dough up toward the center. Next, fold the left side inward, followed by the right side so it slightly overlaps the left. Then fold the top edge down toward the center and bring the bottom edge up and over to seal the dough. Turn the dough over so the seam rests against the counter. Using lightly floured hands, gently pull the dough toward you along the work surface to build surface tension and form a tight round. Use a bench scraper to lift the dough and place it into your floured proofing basket with the seam facing up.
Cold Proof
Step 7: Proof (second rise). Cover the dough and place it in the refrigerator overnight, or up to 48 hours. This slow fermentation deepens the flavor and allows the dough to fully develop while also making it easier to score before baking.
Preheat the Oven
Step 8: Preheat your oven and Dutch oven. When you’re ready to bake, place your Dutch oven (with the lid on) into the oven and preheat thoroughly. A fully heated Dutch oven creates steam and gives your funfetti sourdough that beautiful oven spring and crust.
Score and Bake
Step 9: Score and bake. Remove the dough from the refrigerator and place a sheet of parchment paper over the top of the basket. Carefully invert the dough onto the parchment. Using a bread lame or a very sharp knife, make a score at about a 45° angle, cutting just beneath the surface of the dough. A single long score along one side works well and allows the loaf to expand nicely in the oven.
Carefully remove the preheated Dutch oven from the oven and lift off the lid. Using the parchment paper as handles, gently lower the dough into the Dutch oven. Cover with the lid and bake at 500°F for 30 minutes. Then remove the lid, reduce the oven temperature to 450°F, and continue baking for another 10–15 minutes, until the crust is deeply golden or the internal temperature reaches 208–210°F. Transfer the loaf to a wire rack and allow it to cool completely for 1–2 hours before slicing.
Sample Baking Schedule
Here’s a simple schedule I follow so the dough is ready to bake first thing on a Saturday morning (I love to start the weekend with fresh sourdough!). The great thing about sourdough baking is that it’s very flexible — if your timing shifts, the cold proof can easily be extended so you can bake later in the day or even the following day.
- Thursday Evening (8:00 PM): Feed your sourdough starter. Feed your starter so it’s active and ready to use in the morning. By the next day it should look bubbly, have doubled in size, and smell pleasantly tangy — signs that it’s at peak strength.
- Friday Morning (8:00 AM): Mix the dough. Combine your ingredients and begin bulk fermentation at room temperature. Over the next several hours you’ll perform your stretch and folds and gradually incorporate the rainbow sprinkles so they’re evenly distributed throughout the dough.
- Friday Late Afternoon (5:00 PM): Shape the dough. Once the dough has risen by about 50% and looks airy and jiggly, shape it into a tight round and place it into your proofing basket.
- Friday Evening (5:15 PM): Cold proof overnight. Transfer the dough to the refrigerator for a slow overnight rise. This step develops flavor and makes the dough easier to score before baking.
- Saturday Morning (8:00 AM): Bake your bread. Preheat your Dutch oven, score the dough, and bake. In about an hour, you’ll have a beautiful golden loaf of funfetti sourdough ready to cool — and the perfect way to kick off the weekend.
How to Store Funfetti Sourdough Bread
Store your funfetti sourdough bread at room temperature for a few days or freeze it for longer storage. If storing on the counter, keep the loaf in a breathable container like a paper bag or bread bag, though a plastic bag will work as well. To freeze, slice the bread first and wrap the slices individually before storing for up to 3 months. You can also freeze the entire loaf and thaw it when ready to enjoy.
Equipment for Funfetti Sourdough Bread
You don’t need a ton of special equipment to make this funfetti sourdough bread, but a few helpful tools make the process easier and help you get consistent results.
- Kitchen Scale – A digital kitchen scale is the most accurate way to measure sourdough ingredients. Sourdough baking relies on precise ratios, so weighing your flour, water, and starter will give you the best results.
- Large Mixing Bowl – You’ll need a large bowl to mix the dough and let it rise during bulk fermentation.
- Bench Scraper – One of my favorite sourdough tools. A bench scraper makes it much easier to shape the dough and transfer it to your proofing basket without deflating it.
- Proofing Basket (Banneton) – A banneton helps the dough hold its shape during the final rise and creates those beautiful lines on the finished loaf.
- Bread Lame or Sharp Knife – This is used to score the dough before baking so the bread can expand properly in the oven. Here’s the one I use!
- Dutch Oven – Baking sourdough in a Dutch oven traps steam, which helps create a beautiful oven spring and crispy golden crust.
- Parchment Paper – Makes it easy to transfer the dough into the hot Dutch oven safely. This one is great!
Frequently Asked Questions
Rainbow jimmies (the long, rod-shaped sprinkles) work best for funfetti sourdough bread. They hold their shape and color during fermentation and baking, creating bright rainbow speckles throughout the crumb. Avoid tiny round nonpareils, which tend to bleed color and dissolve into the dough. You can use natural sprinkles, if you’d like, but they will bleed and you won’t get the same vibrant pops of color that classic sprinkles create.
Yes, definitely! If you’d like to add a touch of sweetness to your funfetti sourdough bread you can added 25 to 50g (2 to 4 tablespoons) of granulated sugar, honey, or your preferred sweetener of choice.
Yes, white chocolate is a delicious inclusion for funfetti sourdough bread. Simply add your white chocolate chips or chunks during the stretch and folds the same way you incorprate the sprinkles.
Bread flour is best for acheiving a soft, chewy, open crumb but you can substitute with all purpose flour. I’d recommend reducing the water about about 15 to 30 grams and adding additional mixing time and stretch and folds to help strengthen the dough.
If You Love This Funfetti Sourdough Bread, Try These Recipes Next:
- Blueberry Sourdough Bagels
- How to Make Sourdough Croissants
- Sourdough Cinnamon Rolls
- How To Make Cream Cheese
- Chocolate Chip Sourdough Cookies
Funfetti Sourdough Bread
Ingredients
Sourdough Starter
- 20 g (1 tablespoon) Sourdough starter
- 80 g (⅔ cup) flour
- 80 g (⅓ cup) water
Bread Dough
- 450 g (3 ¾ cups) Bread Flour
- 50 g (⅓ cup) Whole Wheat Flour
- 360 g (1 ½ cups) water
- 1 Tablespoon (15g) Vanilla Extract
- 100 g (½ cup) Sourdough Starter
- 10 g (1 ¾ tsp) salt
- 90 g (½ cup) Rainbow Sprinkles
Instructions
Feed Your Sourdough Starter
- Feed your starter: The night before, or roughly 6 to 12 hours before you plan on mixing the dough, you’ll need to feed your sourdough starter. Reserve 20g of active sourdough starter, and add 80g of water and 80g of flour. Mix together and let sit until it roughly doubles in size and is ripe and bubbly. I like to feed my starter at night and mix the dough in the morning!
Mix The Dough
- Mix the dough: In a large bowl, or the bowl of a stand mixer, add the sourdough starter and water and whisk together. Pour in the bread flour, salt, and vanilla extract, and mix together until a dough forms. Cover the bowl and let rest for 30 minutes.
Bulk Fermentation and Add Sprinkles
- First rise (Bulk fermentation): Let the dough rise at room temperature for 6 to 8 hours, until it increases in volume by roughly 50%, is jiggly when shaken, and has air bubbles on the surface. During the bulk fermentation, you will perform 4 sets of stretch and folds to build strength in the dough and incorporate the sprinkles.
- Stretch and folds and add sprinkles: After the dough has rested for 30 minutes, perform your first set of stretch and folds. Lightly wet your hands, gently lift one edge of the dough, stretch it upward until you feel slight resistance, then fold it over the center. Rotate the bowl and repeat on all four sides (this is one set). Cover and let the dough rest for 30 minutes.After 30 minutes, sprinkle about ⅓ of the sprinkles evenly over the surface of the dough. Perform another set of stretch and folds to incorporate them. Cover and rest 30 minutes. Repeat this process two more times, adding the remaining sprinkles in thirds, for a total of 4 sets of stretch and folds.Continue to let the dough rise until it has increased in volume by roughly 50%, jiggles when shaken, and has air bubbles on top.
- Shape the dough: Once your dough is done with the bulk fermentation, it’s time to shape! First, prepare your proofing basket by lining it with a towel or liner and lightly dusting it with flour. Lightly flour your work surface and the top of the dough, then flip the dough out so the floured side is down, forming a loose rectangle. To shape the dough, begin by folding the bottom third up toward the center. Fold the left side into the middle, then fold the right side over it so they slightly overlap. Next, fold the top edge down just past the center, then bring the bottom edge up and over to seal. Flip the dough so the seam is facing down on the counter. With lightly floured hands, gently pull the dough toward you against the work surface to create surface tension and form a tight round. Use a bench scraper to carefully transfer it into a floured proofing basket, seam-side up. If you’d like a visual reference, this is a helpful video from The Perfect Loaf demonstrating the technique.
- Cold proof (second rise): Cover the dough and transfer to the refrigerator to cold proof overnight, or up to 48 hours. This process helps to develop flavor, and allows time for the starter to break down the flour and release the nutritional and gut-healthy benefits of sordough fermentation!
Day 2: Preheat, Score and Bake
- Preheat: The next morning, or when you’re ready to bake your funfetti sourdough, place your Dutch oven with the lid on into the oven and preheat to 500°F for 30–60 minutes. A fully heated Dutch oven is key for a strong oven spring, so don’t skip this step.
- Score: Remove the dough from the fridge and place a piece of parchment over the top. Carefully flip the dough out onto the parchment. Using a bread lame or sharp knife, score at about a 45° angle, cutting just beneath the surface skin of the dough. One long score along the side works beautifully to let the loaf expand.
- Bake: Carefully remove the hot Dutch oven, take off the lid, and use the parchment to lower the dough inside. Cover and bake at 500°F for 30 minutes. Remove the lid and lower the temp to 450°F, then bake an additional 10–15 minutes, until the crust is golden brown or the internal temperature reaches 208–210°F. Transfer to a wire rack and let cool completely (1–2 hours) before slicing to reveal those colorful funfetti sprinkles.
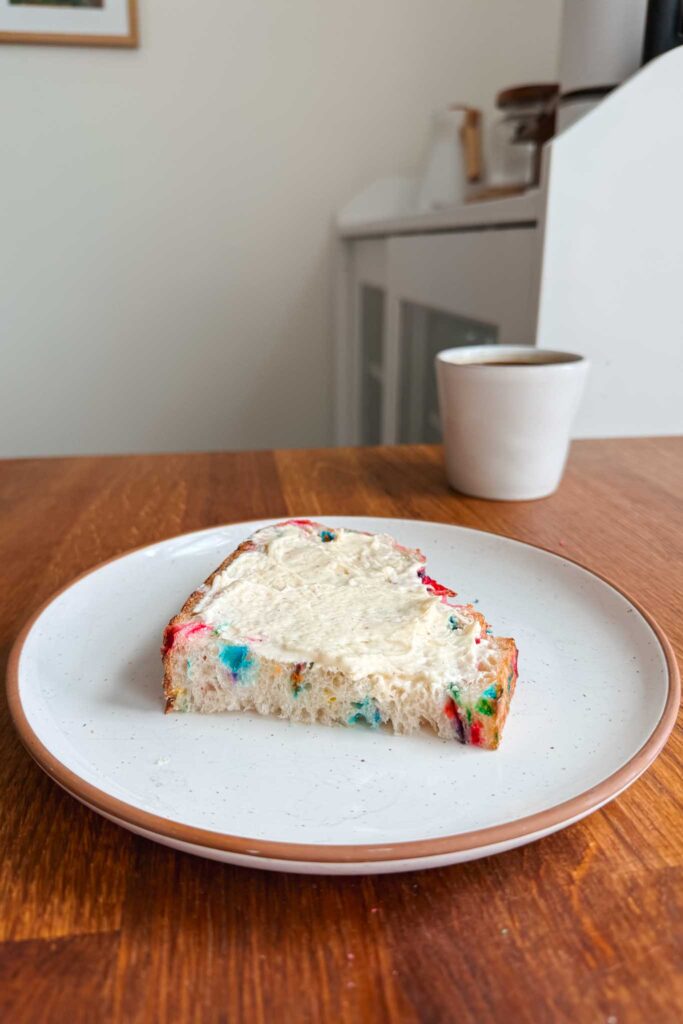
- Enjoy! Enjoy your delicious homemade funffetti sourdough bread with any of your favorite toppings like, whipped brown butter or cream cheese!


Thank you for sharing this recipe! You funfetti sourdough is the prettiest one I’ve seen!